
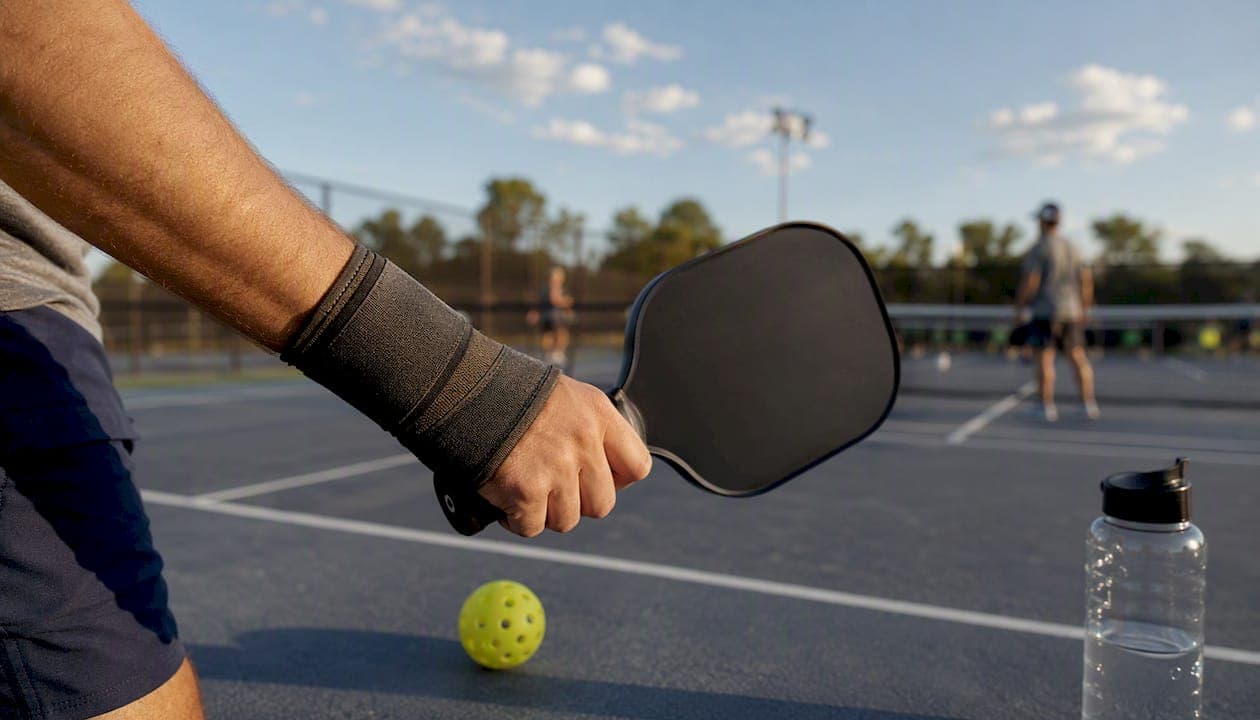
Most pickleball wrist pain traces back to one of four things: repetitive overuse, a wrist-led swing that puts torque on small structures, a paddle that doesn't fit your hand, or an acute fall. The fastest way to stop making it worse is to rest from aggravating shots, ice for 15–20 minutes, and consider a semi-rigid brace for any activity that loads the wrist.
Immediate actions:
- Stop shots that reproduce the pain (hard drives, spin serves, flick volleys)
- Ice the wrist for a short duration multiple times per day
- Wear a semi-rigid wrist brace during activities for the first few days
- Reduce session frequency and duration while symptoms are present
- Schedule a physical therapy evaluation if pain persists beyond a few days
Stop self-care and see a clinician if you notice: sudden swelling or bruising after a fall, deformity or instability in the wrist, numbness or tingling in the fingers, pain that wakes you at night, or a grip so weak you can't hold a paddle. These are red flags for fracture, TFCC tear, or nerve involvement — conditions that need imaging, not just rest.
The American Society for Surgery of the Hand notes that both acute and overuse wrist injuries are common in pickleball, and it recommends early movement-based prevention with specialist referral when red flags appear.
Key Takeaways
Wrist pain in pickleball is almost always preventable and treatable when you address mechanics, load management, and tissue conditioning together, not in isolation.
| Point | Details |
|---|---|
| Most common causes | Overuse, wrist-led mechanics, poor grip fit, and acute falls drive the majority of pickleball wrist injuries. |
| Red flags to act on | Swelling after a fall, night pain, numbness, or grip loss require prompt clinical evaluation, not more rest. |
| Rehab timeline | Mild tendonitis resolves in 1–6 weeks; TFCC injuries typically need 6–12 weeks of structured rehab. |
| Technique is the root cause | Shifting power to the shoulder and torso reduces wrist load more than any brace or equipment change alone. |
| Playonpickle's role | AI-driven movement analysis identifies your specific swing faults and delivers a personalized prevention plan. |
Table of Contents
- Why pickleball wrist pain happens: overuse, mechanics, and common diagnoses
- Symptoms to watch for and red flags that need medical attention
- How technique and the kinetic chain drive wrist overload
- Progressive strengthening for the wrist, forearm, and shoulder
- Stretches and mobility drills for the wrist and forearm
- How paddle selection and grip reduce wrist strain
- Warm-up, ramp-up, and session planning to avoid overload
- Rest, rehab expectations, and return-to-play timelines
- Which clinicians to see and what to expect
- How movement analysis helps prevent wrist overload
- Daily habits and a quick checklist to prevent recurrence
- Playonpickle gives you a movement-based wrist injury prevention plan
- Sources
Why pickleball wrist pain happens: overuse, mechanics, and common diagnoses
The short answer: most wrist pain in pickleball players is overuse-driven, not the result of a single dramatic injury. Repetitive wrist rotation, gripping a paddle for hours each week, and compensating for weak shoulder or core drive all add up faster than tendons can adapt.
Overuse conditions
Baptist Health documents that tendonitis and overuse wrist problems are among the most common pickleball complaints, and that most minor cases respond to rest, ice, and progressive rehab. The three overuse diagnoses that show up most often:
- Wrist extensor tendonitis: aching along the top of the forearm and wrist, worst after play
- ECU (extensor carpi ulnaris) tendinitis: pain on the pinky side of the wrist, provoked by forehand drives and pronation
- TFCC (triangular fibrocartilage complex) degeneration or tear: deep, ulnar-sided wrist pain that worsens with rotation, gripping, or weight-bearing through the wrist
The TFCC is a cartilage-and-ligament disc that cushions the ulnar side of the wrist during rotation. In pickleball, every topspin drive and wrist-flick volley compresses and shears it. Wrist injuries, including TFCC tears, are among the top three musculoskeletal complaints in pickleball players, and TFCC problems are especially common in players over 50 because the disc thins with age.
De Quervain's tenosynovitis is another overuse pattern worth knowing: it produces pain at the base of the thumb and radial (thumb) side of the wrist, provoked by gripping and ulnar deviation. Players who use a lot of wrist snap on serves are particularly prone.
Acute injuries
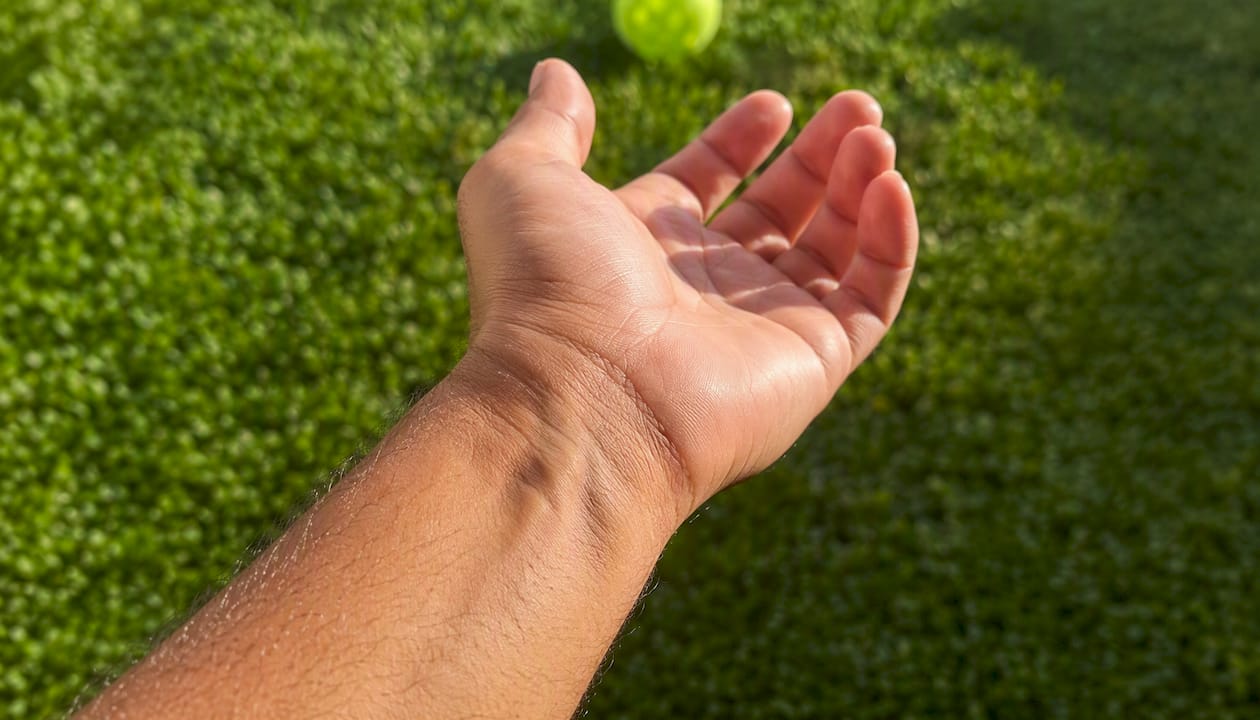
Acute wrist injuries in pickleball usually follow a fall on an outstretched hand (FOOSH). The result can range from a mild sprain (stretched ligaments) to a scaphoid fracture, which is notoriously easy to miss on initial X-ray. Any wrist pain after a fall that doesn't improve within 48–72 hours deserves imaging.
Pro Tip: If your wrist pain is specifically on the pinky side and gets worse when you rotate your forearm (like turning a doorknob), that pattern points to the TFCC or ECU tendon, not a generic sprain. Naming the location precisely helps your clinician order the right imaging from the start.
Symptoms to watch for and red flags that need medical attention
Most wrist soreness after a long session is normal. The line between "take a day off" and "get this checked" comes down to a handful of specific signals.
Red flags that require prompt medical evaluation:
- Visible swelling or bruising within hours of a fall or impact
- Any deformity, instability, or a "clunk" sensation with wrist movement
- Numbness, tingling, or weakness in the fingers (possible nerve compression or carpal tunnel involvement)
- Pain that wakes you at night or is present at rest
- Inability to grip a cup or paddle without significant pain
- Range-of-motion loss that doesn't improve after 48 hours of rest
University of Utah Health clinical guidance advises seeking medical attention when wrist pain lasts more than a few days, is associated with swelling or bruising, or produces significant range-of-motion loss or night pain.
Emergency warning: If you fall and your wrist looks deformed, you cannot move it, or you feel severe pain with any pressure, treat it as a possible fracture. Go to urgent care or an emergency room — do not play through it, and do not wait to see if it "loosens up."
Carpal tunnel syndrome can also flare in pickleball players due to sustained grip and repetitive wrist flexion. The hallmark is numbness or tingling in the thumb, index, and middle fingers, often worse at night. It is a separate diagnosis from tendonitis and responds to different treatment, which is one more reason to get a proper clinical exam rather than self-diagnosing.
Pro Tip: Take a photo of any swelling or bruising the day it appears. Swelling often peaks 24–48 hours after injury, and a time-stamped photo gives your clinician useful information about the injury's severity and progression.
How technique and the kinetic chain drive wrist overload
Poor mechanics, not just playing frequency, is a leading cause of wrist pain in pickleball. The wrist is a small structure designed to transmit force, not generate it. When players use their wrist as the primary power source, the load on the TFCC and ECU tendons multiplies with every shot.
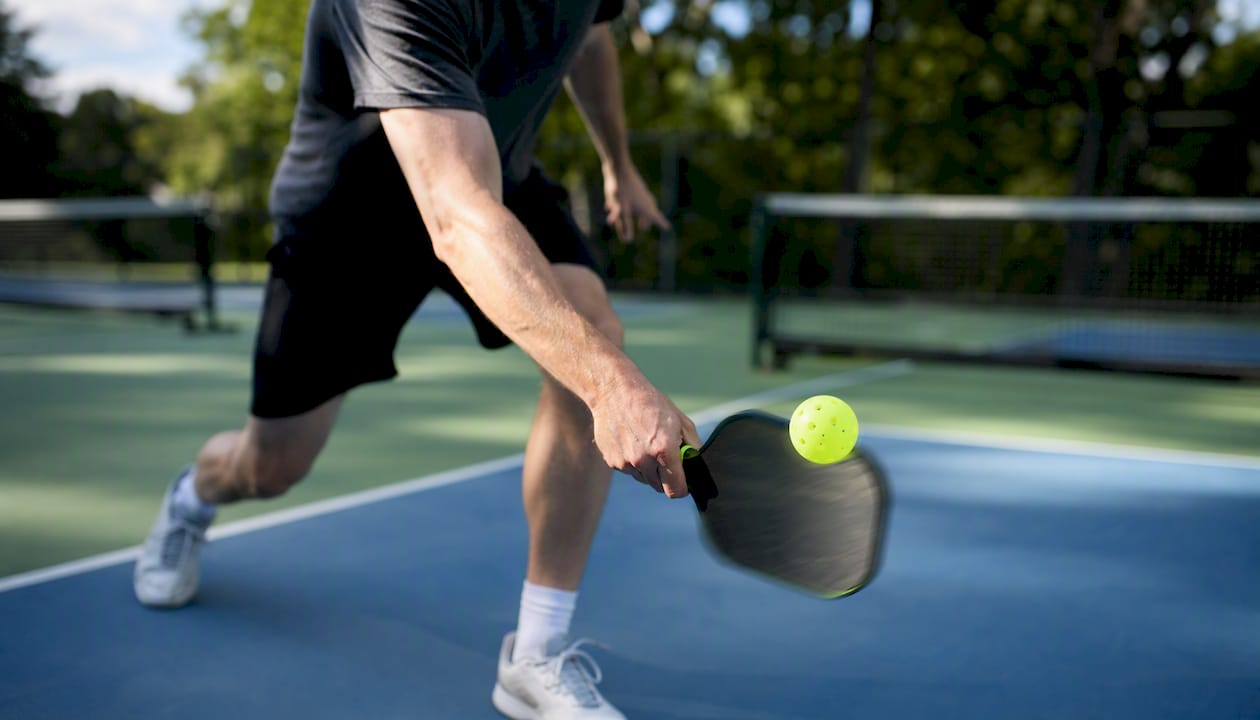
What the wrist-led drive looks like
A wrist-led drive is easy to spot: the paddle head flicks forward at contact rather than the arm and shoulder driving through the ball. It shows up most on hard groundstrokes, topspin serves, and overhead smashes. Players who learned tennis or racquetball sometimes import this habit. Others develop it to compensate for limited shoulder rotation or a weak core.
Physical therapists at Towson Orthopaedics identify the wrist-led drive as a core biomechanical fault and recommend shifting power generation to the shoulder and full kinetic chain to protect the wrist. The kinetic chain means that force travels from the ground up through the legs, hips, torso, shoulder, and arm before it ever reaches the wrist. When any link in that chain is weak or restricted, the wrist compensates.
Coaching cues that shift load proximally
- "Lead with your elbow, not your wrist" on forehand drives: the elbow extends first, and the wrist stays firm at contact
- "Rotate your torso through the ball": cue players to feel their belly button turn toward the target, not just their arm swing
- "Freeze your wrist at contact": a deliberate cue to hold the wrist neutral through the strike zone, letting shoulder and forearm do the work
Drill example: Shadow-swing in slow motion in front of a mirror. Watch whether your wrist breaks forward before or at contact. If it does, slow down further and practice keeping the wrist locked until after the follow-through. Ten minutes of slow-motion shadow work before a session retrains the pattern faster than hours of full-speed play.
Wrist pain often reflects a kinetic-chain inefficiency. Players who flick the wrist are compensating for limited shoulder or torso drive, creating chronic overload on small wrist structures.
Pro Tip: Record yourself from the side during a drill session. Playonpickle's movement analysis identifies exactly this kind of stress point before it becomes an injury.
Progressive strengthening for the wrist, forearm, and shoulder
Tendons respond to load, not rest. Progressive and eccentric loading rebuilds tendon tolerance, which is why a well-structured strengthening program prevents recurrence far better than simply waiting for pain to subside. Mend Colorado's PT guidance supports controlled movement and progressive strengthening over prolonged immobilization for most overuse wrist problems.
Three-phase progression
Phase 1 — Isometrics (Days 1–7 or while pain is above 3/10): Hold the wrist in a neutral position and press against a fixed surface (table edge, opposite hand) without movement. Three sets of 10-second holds, twice daily. No pain should exceed 3/10 during the exercise.
Phase 2 — Light isotonic loading (Weeks 2–4):
- Wrist curls: 3 × 15 with a light dumbbell (1–3 lb), palm up
- Reverse wrist curls: 3 × 15, palm down
- Ulnar and radial deviation: 3 × 12 each direction with a hammer or light dumbbell held vertically
- Forearm pronation/supination: 3 × 15 with a light load
Phase 3 — Eccentric and sport-specific loading (Weeks 4–8):
- Eccentric wrist extension: lower the wrist slowly over 3–4 seconds from extension to neutral, 3 × 12
- Scapular rows and rotator cuff work (external rotation with a band): 3 × 15
- Grip strengthening with a stress ball or hand gripper: 3 × 20 reps
| Phase | Duration | Sets × Reps | Frequency | Load |
|---|---|---|---|---|
| Isometric | Days 1–7 | 3 × 10-sec holds | Twice daily | Bodyweight/resistance |
| Light isotonic | Weeks 2–4 | 3 × 12–15 | 4–5 days/week | 1–3 lb |
| Eccentric/sport | Weeks 4–8 | 3 × 12 | 3–4 days/week | 3–5 lb, band |
Do's and don'ts:
- Stop any exercise that produces sharp or shooting pain above 4/10
- Soreness of 2–3/10 during exercise that resolves within an hour afterward is acceptable
- Never skip the shoulder and scapular work — proximal strength reduces wrist load significantly
- Don't rush Phase 3; tendons adapt slowly and respond poorly to sudden load spikes
Pro Tip: The eccentric phase is where most players see the biggest gains. Lower the weight slowly (3–4 seconds down) rather than lifting and lowering at the same speed. That slow lowering is what drives tendon remodeling.
Stretches and mobility drills for the wrist and forearm
Mobility work serves two different purposes depending on timing. Before play, it prepares the wrist for load. After play or during rehab, it reduces tightness and maintains range of motion. Skipping it entirely is one of the most common reasons players re-aggravate a healing wrist.
Pre-play (dynamic, 30–60 seconds each):
- Wrist circles: 10 slow rotations each direction
- Prayer stretch and reverse prayer: palms together, fingers up, then fingers down; hold 10 seconds each
- Forearm pronation/supination: rotate the forearm fully in each direction, 10 reps
Post-play and rehab (static, 30–45 seconds each):
- Wrist flexor stretch: arm extended, palm up, gently pull fingers back with the opposite hand
- Wrist extensor stretch: arm extended, palm down, gently pull fingers toward you
- Tendon glides: starting with fingers straight, curl into a hook fist, then a full fist, then a tabletop position — 5 reps through the full sequence
- Gentle TFCC-friendly rotation: forearm supported on a table, rotate the wrist slowly through a pain-free range only
Pro Tip: Two minutes courtside before you pick up a paddle makes a measurable difference. Try this sequence: 10 wrist circles each direction, 10-second prayer stretch, 10 forearm pronation/supination reps, and 10 slow shadow swings with a loose grip. That's it. Players who skip this step are the ones who feel stiff and sore in the first game.
For a full warm-up and injury-prevention routine, the Play On Pickle blog covers mobility and load-management strategies in more detail.
How paddle selection and grip reduce wrist strain
Grip size and paddle swing weight are the two most modifiable equipment variables for wrist health. Neither requires buying a new paddle immediately.
Grip size: A handle that's too thin forces you to grip harder to maintain control, which increases forearm and wrist tension throughout a session. The index-finger-in-palm test is a quick check: hold the paddle in your dominant hand with a normal grip, then slide the index finger of your opposite hand into the gap between your fingertips and palm. One finger should fit snugly. Two fingers means the grip is too large; no gap means it's too small.
Adding overgrips: Wrapping one or two overgrips over the existing handle is the cheapest and fastest way to increase circumference. Player communities report meaningful relief after this single change, often within a session or two. Overgrips also absorb sweat, which reduces the compensatory squeezing that comes with a slippery handle.
Swing weight: A heavier paddle head generates more torque at contact, which the wrist must resist. Switching to a lighter paddle or one with a lower swing weight (generally under 110 on the swing-weight scale) reduces that demand. The trade-off is some loss of punch on hard drives, but for a player managing wrist pain, that's a reasonable exchange.
| Adjustment | Benefit | Trade-off |
|---|---|---|
| Add overgrip (1–2 wraps) | Reduces grip tension, improves control | Slightly less paddle feel |
| Lower swing weight | Less torque at contact, less wrist load | Reduced power on drives |
| Softer core material | Absorbs more vibration | Slightly less pop |
Pro Tip: Before spending money on a new paddle, add two overgrips and play two sessions. If wrist tension drops noticeably, grip size was part of the problem. If it doesn't change, swing weight or mechanics are the bigger factor.
For more on gear basics, the Pickleball 101 guide on Play On Pickle covers equipment fundamentals.
Warm-up, ramp-up, and session planning to avoid overload
A short warm-up combined with a graded increase in weekly volume prevents most overuse cases. The injury rarely comes from one long session. It comes from jumping from two sessions per week to five, or from adding a tournament weekend on top of an already full training schedule.
Warm-up steps (2–3 minutes before every session):
- Wrist circles and prayer stretches (see mobility section above)
- Light shadow swings with a loose grip, focusing on torso rotation
- Dynamic forearm pronation/supination, 10 reps
- Three to five slow, controlled dinks to ease into wrist load
Safe ramp-up for returning players (weeks 1–4):
- Week 1: Two sessions of 20–30 minutes, dinking and soft shots only
- Week 2: Two to three sessions of 30–40 minutes, add light groundstrokes
- Week 3: Three sessions of 45 minutes, reintroduce drives at 70% effort
- Week 4: Three to four sessions at normal duration, full shot variety if pain-free
Load-management rules:
- Never increase total weekly playing time by more than 10–15% from one week to the next
- Add a rest day after any session where wrist soreness exceeds 3/10
- During recovery, replace hard drives with dinking and soft volleys to maintain touch without load
Pro Tip: Keep a simple session log for four weeks: date, duration, and a 1–10 wrist soreness rating after play. Patterns become obvious fast. Most players discover their pain spikes after sessions longer than 60 minutes or after two consecutive days without rest.
Rest, rehab expectations, and return-to-play timelines
Healing timelines vary by injury type, but having a realistic framework prevents the two most common mistakes: returning too soon or staying out too long.
| Phase | Typical Duration | Rehab Focus | Red-Flag Checkpoint |
|---|---|---|---|
| Acute rest | Days 1–7 | Ice, brace, isometrics | Swelling not improving → see clinician |
| Early rehab | Weeks 2–4 | Light isotonic strengthening, mobility | Pain above 4/10 during exercise → back off |
| Progressive loading | Weeks 4–8 | Eccentric work, sport-specific drills | Symptom recurrence with load → reassess |
| Return to play | Weeks 6–12+ | Graded court time, full shot variety | Any new swelling or night pain → stop |
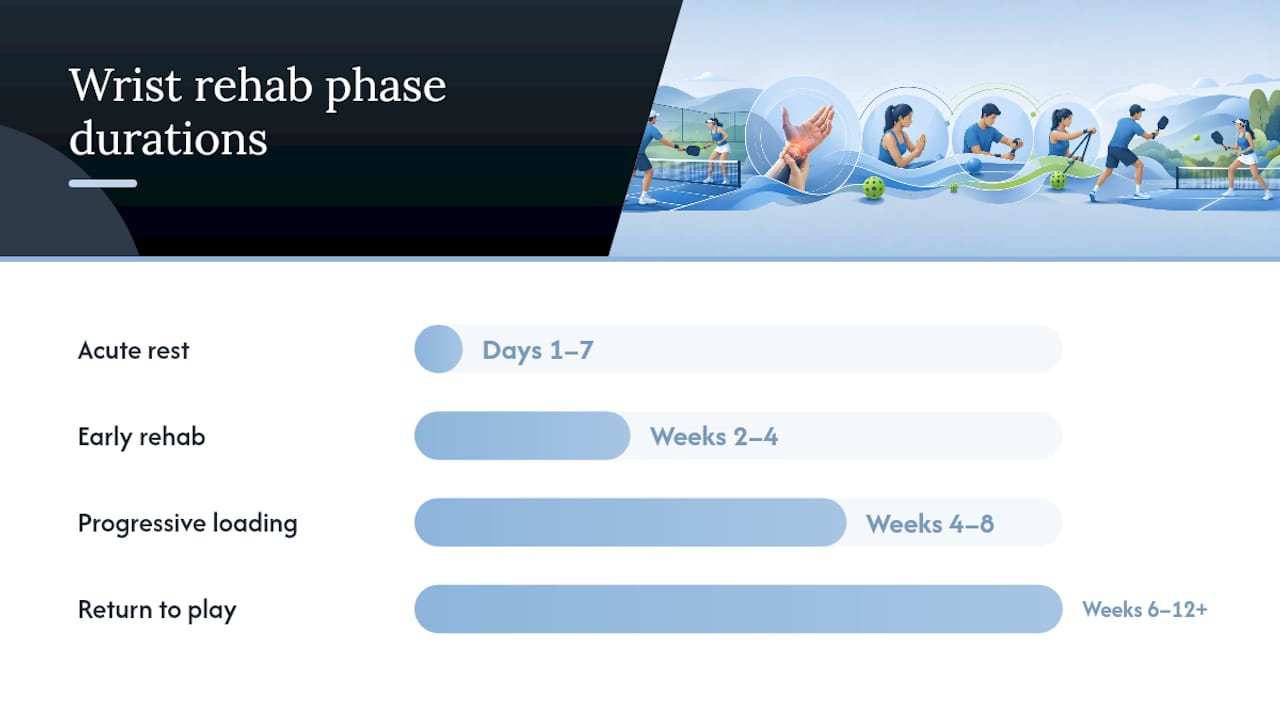
Mild sprains and tendonitis often resolve within a few weeks with consistent conservative care. TFCC injuries typically need weeks to months for recovery, with mild-to-moderate cases healing faster and surgical cases requiring longer rehab. These are estimates, not guarantees, and individual healing varies.
Return-to-play checklist:
- Pain-free grip strength equal to the uninjured side
- Full wrist range of motion without pain at end range
- Able to perform wrist circles and forearm rotation without discomfort
- Completed the 4-week ramp-up protocol without symptom recurrence
- No night pain or resting pain in the 72 hours before returning to full play
Pro Tip: "Pain-free" means during AND after activity. A wrist that feels fine during play but aches for hours afterward is not ready for full return. The post-session window is the most honest signal of tissue readiness.
Maintenance after return matters as much as the rehab itself. Keep two strengthening sessions per week, stick to the warm-up routine, and revisit load-management rules any time you add a tournament or increase session frequency.
Which clinicians to see and what to expect
Who you see first depends on what your symptoms suggest.
Start with a physical therapist if:
- Pain is gradual onset with no specific trauma
- You can still grip and move the wrist, even if it's uncomfortable
- Symptoms have been present less than two weeks and are not worsening
Go to urgent care or an orthopedic clinic first if:
- Pain followed a fall or direct impact
- There is visible swelling, bruising, or deformity
- You cannot grip or bear weight through the wrist
See a hand surgeon if:
- Symptoms persist beyond 6–8 weeks of conservative care
- Imaging shows a TFCC tear, scaphoid fracture, or ligament instability
- You have a "clunk" or instability sensation with wrist rotation
Typical diagnostic pathway:
- Clinical exam: range of motion, grip strength, provocative tests (Watson test for scaphoid, fovea sign for TFCC)
- X-ray: rules out fracture; often the first imaging ordered
- MRI: used when soft-tissue injury (TFCC, ligament) is suspected and conservative care has not resolved symptoms
- Referral to hand surgeon: when imaging confirms structural damage or conservative care fails
In physical therapy, expect movement analysis, progressive loading protocols, and technique coaching. A hand surgeon evaluation adds imaging review and, when warranted, discussion of arthroscopic options for TFCC tears that don't respond to conservative care.
How movement analysis helps prevent wrist overload
Movement analysis identifies the biomechanical stress points that lead to wrist overload before they become injuries. A player can follow every exercise in this article and still re-aggravate their wrist if the underlying swing fault stays in place.
Playonpickle uses AI-driven video analysis to detect exactly these patterns: wrist-led drives, grip compensation, and kinetic-chain breakdowns that a standard clinic visit rarely captures in real time. The platform generates a personalized injury risk assessment and delivers targeted exercise recommendations based on each player's actual movement, not a generic protocol.
- Upload a short video of your play
- Receive a biomechanical stress-point report identifying where wrist load is highest
- Get a personalized exercise and technique plan tied to your specific movement patterns
Pro Tip: Combine clinic PT with Playonpickle's movement data for the fastest progress. PT addresses tissue healing; movement analysis addresses the mechanical cause. Treating only one without the other is why so many players recover, return to play, and re-injure within weeks.
For broader context on how movement science applies to pickleball injury prevention, the Jeff Webb injury analysis on the Play On Pickle blog is worth reading.
Daily habits and a quick checklist to prevent recurrence
Prevention checklist:
- Two-minute courtside warm-up before every session
- Two strengthening sessions per week (Phase 2 or 3 exercises, depending on fitness level)
- Check grip size every few months; re-wrap overgrips when they feel slick
- Log session duration and wrist soreness weekly to catch load spikes early
- Avoid wrist-led drives; cue torso rotation on every hard shot
- Reduce spin and wrist snap during high-volume weeks or tournament prep
In-session adjustments when the wrist feels fatigued:
- Switch to dinking and soft volleys for the remainder of the session
- Loosen your grip pressure by one notch (aim for a 4–5 out of 10 squeeze)
- Shorten the session by 15–20 minutes rather than pushing through
- Ice immediately after play if soreness is above 3/10
For more on overuse injuries and how they connect to elbow and wrist health, the Pickle Elbow article on Play On Pickle covers the full repetitive-stress picture.
What most players get wrong about wrist injury prevention
The conventional advice is "rest when it hurts." That's not wrong, but it's incomplete in a way that keeps players stuck in a cycle of injury, rest, and re-injury. Rest removes the irritant; it doesn't build the capacity to handle load. The players who stay healthy long-term are the ones who treat the off-court work as seriously as court time.
The other thing most players underestimate is how much technique drives wrist load. Two players can play the same number of hours per week, and the one with a wrist-led drive will develop tendonitis while the other stays fine. Equipment tweaks help, but they're a patch on a mechanical problem. The real fix is upstream: shoulder strength, torso rotation, and a firm wrist at contact.
One habit worth adopting immediately: after every session, spend 90 seconds on wrist extensor and flexor stretches before you leave the court. It takes less time than checking your phone, and it's the single most consistent differentiator between players who manage wrist health well and those who don't.
Playonpickle gives you a movement-based wrist injury prevention plan
Knowing the causes of wrist pain is one thing. Knowing which specific fault in your swing is driving it is another. Playonpickle's AI-powered movement analysis pinpoints the exact biomechanical stress points in your game, whether that's a wrist-led drive, a grip compensation pattern, or a kinetic-chain gap, and delivers a personalized exercise and technique plan to address them.

Players who combine clinic PT with Playonpickle's data address both tissue healing and the mechanical cause, which is why they return to play faster and stay there. The platform runs on a monthly subscription with a free trial to start, so you can see your movement report before committing. Start your free trial at Playonpickle and find out exactly where your wrist is absorbing load it shouldn't.
Sources
These sources were selected for clinical relevance, PT-grounded guidance, and player-focused rehab applicability.
- Pickleball wrist pain: what's all the racket — ASSH
- Pickleball injury prevention — Towson Orthopaedics
- Pickleball-related hand and wrist injuries — Baptist Health
- When to see a doctor for hand and wrist pain — University of Utah Health
- Pickleball wrist pain? Here’s how to fix it — Pickleball Union
This article is general information, not a substitute for advice from a qualified doctor. Consult a qualified healthcare professional about your own circumstances before acting on anything here.
Recommended
- Pickle Elbow, FOOSH… — Play On Pickle - Smart Pickleball Fitness
- Pickleball 101: Understanding the Game, Rules, and Essential Fitness and Gear — Play On Pickle - Smart Pickleball Fitness
- Blog | Improve Your Game Now — Play On Pickle - Smart Pickleball Fitness
- The Dink Movie — Play On Pickle - Smart Pickleball Fitness