
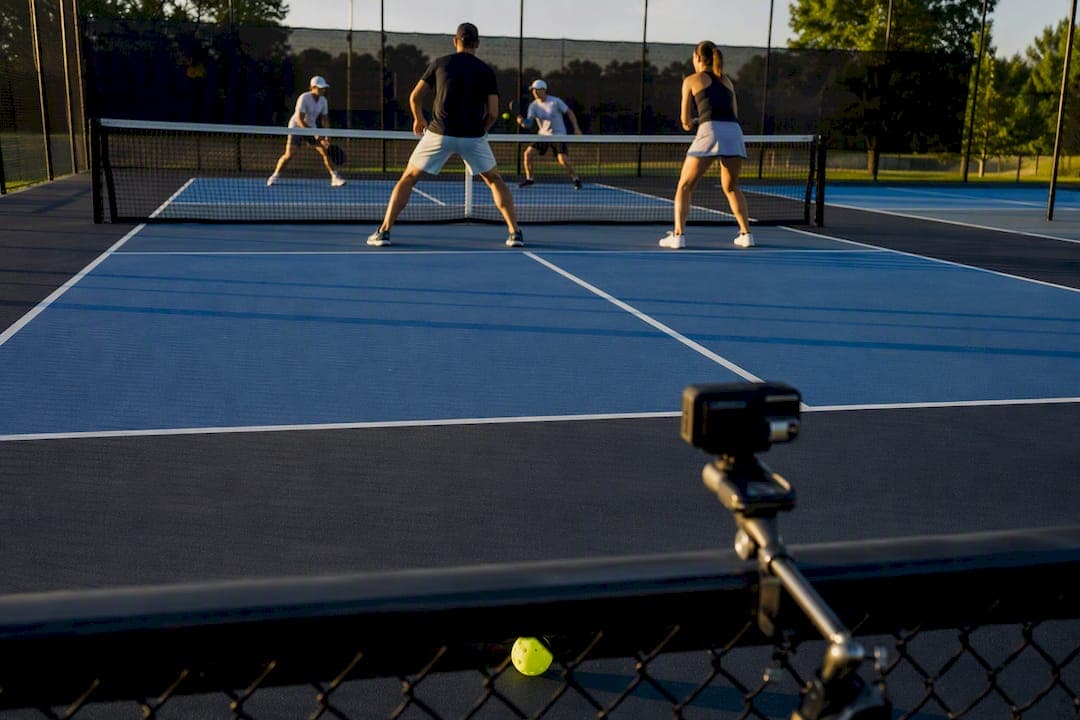
For most players, the default angle is behind the baseline, camera raised 7 to 10 feet, centered on the court, for full-match positioning analysis. Add a side-court angle, parallel to the kitchen line at a similar height, when the goal is stroke mechanics rather than court coverage. Pick the angle based on what you're trying to learn, not on what's easiest to set up.
TL;DR:
- Using the baseline angle behind the court at 7 to 10 feet high is most practical for overall match analysis, partner spacing, and shot patterns.
- Side-court angles at 8 to 10 feet high provide detailed views of swing mechanics, hip rotation, and paddle contact, especially for biomechanical focus.
- Filming at 1080p and 60 fps offers a good balance for clarity and motion tracking, with 4K reserved for cropping and detailed analysis if storage allows.
- Mount stability, achieved via tripods or tethered fence mounts, is critical to prevent footage drift, with a quick test recording recommended before matches.
- Recording consistently from the same angle and settings over time is essential for effective AI-driven movement analysis and injury prevention insights.
Table of Contents
- Camera Angles Pickleball Players Should Use First
- Camera Settings and Framing That Actually Hold Up
- Mounts and Hardware: What Actually Holds Steady
- Choosing an Angle by What You're Actually Trying to Learn
- Running a Simple Multi-Angle Setup Without Overcomplicating It
- Fixing the Footage Problems That Ruin Analysis
- Why Consistent Footage Matters for AI-Driven Movement Analysis
- My Take: Start Simple, Improve the Setup Later
- Turning Filmed Sessions Into Injury-Prevention Insights
- Sources
- FAQ
Camera Angles Pickleball Players Should Use First
Every good filming decision starts with one question: what are you actually trying to see? Positioning and shot selection need a wide view. Swing mechanics need a close, unobstructed side view. Trying to get both from one camera usually means getting neither well.
Baseline (behind the court) is the workhorse angle for match and positioning review. Mount the camera behind one baseline, centered, at 7 to 10 feet high, and you'll frame both baselines, both sidelines, the net, and every player without anyone stepping out of shot. This is the angle coaches reach for when reviewing partner spacing, court coverage, transition footwork, and shot patterns over a full game. It's also the easiest angle to set up alone, since one camera behind the fence covers the whole exchange.
Side-court angles serve a completely different purpose. Set the camera parallel to the kitchen line at roughly 8 to 10 feet high, and you get a clean read on swing path, hip and shoulder rotation, and exactly where the paddle meets the ball. You lose the far court in this framing. That's the trade you're making for mechanical detail, and it's usually worth it if biomechanics is the point of the session.
Elevated corner or diagonal angles are the fallback when a true centered baseline setup isn't possible, maybe a fence layout blocks the center, or you're filming at a public court with no good midline spot. A diagonal view from an elevated corner still shows most of the court, but expect some asymmetry: the far sideline compresses, and depth judgments get slightly less reliable than a dead-center shot. It's a reasonable compromise, not a first choice.
Close kitchen shots trade court context for detail. Get low and near the net, and you'll capture hand speed, dinking touch, and reset mechanics that a wide shot simply can't resolve at normal resolution. The obvious downside: you see almost nothing beyond the kitchen zone, so this angle only makes sense as a supplement, not a primary view.
A few real scenarios make the choice concrete:
- Casual weekly review with one camera: baseline behind the court. It gives you the most usable information per minute of setup time.
- Coaching session focused on a rebuilt backhand: side-court, possibly paired with a slow-motion clip from the same angle.
- Content for social media or a highlight reel: close or diagonal shots that emphasize action and personality over tactical completeness.
- Injury-risk or movement screening: a consistent side or elevated angle, repeated the same way every session, matters more than which angle you pick.
The single-camera baseline setup remains the most practical starting point for the majority of players, since even a static wide shot gives you dramatically more to work with than no footage at all.
Camera Settings and Framing That Actually Hold Up
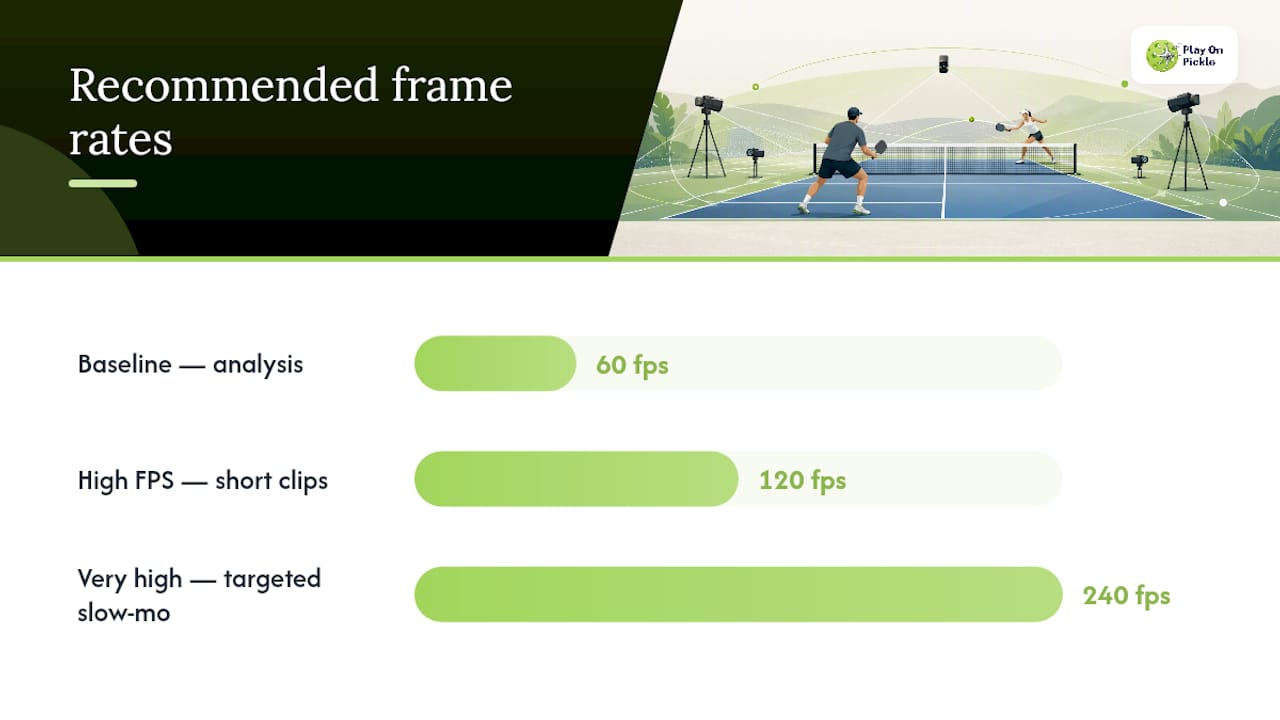
Landscape orientation, 1080p resolution, 60 frames per second. That's the default worth defaulting to for nearly all match analysis, whether you're reviewing your own game or sending clips to a coach. It balances file size, clarity, and smooth enough motion to track a fast dink exchange without stutter.
Bump up to 4K at 60 fps only when you plan to crop in tight during editing, say, isolating one player from a wide baseline shot, and you have the storage to spare. 4K files fill up a phone fast, and most analysis doesn't need the extra resolution if your framing is already tight enough.
Pro Tip: If you're not sure whether you need 4K, shoot a 30-second test clip at both 1080p and 4K, then crop each the same amount in your phone's editor. If 1080p still looks clean after cropping, skip 4K entirely and save the storage.
High frame rate modes, 120 to 240 fps, earn their place only for short, targeted clips: a single serve motion, one drive, a specific drill rep. Recording an entire match at 240 fps burns through storage and can overheat a phone camera within 20 minutes on a hot court. Save the slow-motion setting for the moments that need frame-by-frame breakdown.
Lens choice matters more than most players assume. Stick with the standard 1x lens whenever you have the setback distance to use it, since it renders court lines and body proportions accurately. Switch to ultra-wide only when you're physically boxed in and can't step back far enough to fit the full court, and know that straight lines near the frame edges will bow slightly as a result.
A short settings checklist worth taping to your gear bag:
- Landscape orientation, never portrait, for anything you'll analyze frame by frame.
- 1080p/60fps as the baseline; 4K/60fps only with a cropping plan and storage to spare.
- Standard lens by default; ultra-wide only as a last resort for tight spaces.
- Match frame rate across all cameras if you're running a multi-angle setup, since mismatched fps makes syncing footage a headache later.
- Avoid shooting directly into the sun or bright sky; check the live preview before you walk away.
Mounts and Hardware: What Actually Holds Steady
Your angle only matters if the camera stops moving mid-point. Hardware choice comes down to a simple trade: stability and reach versus speed of setup.
- Tall tripod or telescoping pole. This is the gold standard for reaching that 7 to 10 foot elevated baseline view without a fence or backstop to lean on. It's also the slowest option to carry, extend, and level, so it fits players who film regularly enough to justify the extra bag weight.
- Fence mounts and magnet mounts. These deploy in under a minute and work well at courts with metal fencing. The catch: they can shift during play, especially if a ball or a gust of wind catches the setup. Add a ball joint for fine tilt control and tether the mount to the fence with a bungee cord as a backup against drift.
- Flexible tripods (the bendable-leg kind). Great for quick, low-angle shots wrapped around a post or fence rail. They're not built for elevated, analytic footage where a stable, level frame matters over a full game.
- Permanent elevated mounts or pole systems. Worth it only if you have consistent access to the same court, your backyard setup or a club that allows fixed installations, since they deliver the most repeatable high-elevation angle session after session.
Magnet mounts in particular are limited without that ball joint in between; the joint is what makes a quick mount usable for precise framing instead of a rough guess.
Pro Tip: After attaching any bungee-tethered mount, hit record for 10 seconds and check the preview before you start playing. A mount that looks solid standing still can still creep once the fence gets bumped by a stray ball.
A few setup habits save footage more often than better gear does: tether anything mounted outdoors against wind, recheck the frame after any tether adjustment, and scout for foot traffic near your tripod before matches start on busy public courts.
Choosing an Angle by What You're Actually Trying to Learn
Match and positioning analysis calls for the baseline view, and a single camera is genuinely enough here. You're watching spacing between partners, transition timing from baseline to kitchen, and where shots tend to land, none of which needs a second angle to interpret.
Stroke mechanics and contact point work want the side-court or close-up angle instead. If you're isolating a single serve or drive motion, a brief high frame rate clip from that same side angle adds real value without the storage cost of filming a whole session that way.
Movement screening and injury-risk review sit in their own category. What matters most isn't which single angle you pick, it's picking one elevated side view and sticking with it across sessions. Consistency across weeks builds the kind of longitudinal record that reveals whether a knee is tracking differently than it did a month ago.
Content built for social media has different priorities altogether. A landscape analysis clip won't hold attention on its own; shoot a vertical or tight close-up alongside it if the footage needs to double as something shareable.
- Positioning and tactics → baseline, single camera.
- Mechanics and contact → side-court or close-up, occasional slow motion.
- Movement and injury patterns → same elevated angle, repeated on a schedule.
- Social content → vertical or close shot layered on top of the analysis clip.
Running a Simple Multi-Angle Setup Without Overcomplicating It
Two cameras cover almost every serious use case: one behind the baseline, one at the side-court. That pairing gives you positioning data and mechanical detail from the same session instead of forcing a choice between them.
- Set both cameras to the same frame rate before you start recording. Mismatched fps between angles is the single biggest reason syncing footage in editing becomes a frustrating exercise instead of a five-minute task.
- Use an audible sync cue. A hand clap or a spoken countdown at the start of the clip gives you a clean marker to line up both angles later, no special software required.
- Name files consistently. Something like
2026 09 01 CourtA Baselineand2026 09 01 CourtA Sidekeeps weeks of footage searchable instead of buried in a generic camera roll. - Decide your cadence. Routine single-camera recording works fine for weekly review. Reserve the full two-camera, higher-effort setup for periodic biomechanical snapshots, every two to four weeks is a reasonable rhythm for most recreational and competitive players tracking a longer training plan.
The consistency matters more than the camera count. Filming the same way, at the same settings, on a repeatable schedule is what turns a folder of clips into something you can actually compare over time.
Fixing the Footage Problems That Ruin Analysis
Most bad pickleball footage traces back to one of five fixable mistakes.
- Far-court players blocked from view: raise the camera or move it back. Test by having someone stand at the kitchen line before you start recording for real.
- Players too small or blurry to read: move the camera closer rather than immediately reaching for 4K, resolution helps less than distance does.
- Distorted lines from an ultra-wide lens: switch back to the standard 1x lens and step back if you can, or accept the slight bowing at the frame edges when setback genuinely isn't possible.
- Camera drifting mid-session: tether tripods, add a weight to the base in wind, and use bungee cords on any fence or magnet mount.
- Washed-out or backlit footage: never shoot directly into the sun; in dim conditions, favor a higher frame rate over slowing the shutter, which introduces motion blur on fast exchanges.
Pro Tip: Do a 10 second test recording before every session and actually watch it back, not just glance at the live preview. Drift, glare, and blocked sightlines are far easier to catch and fix in ten seconds than after a full match is already in the can.
Why Consistent Footage Matters for AI-Driven Movement Analysis
Automated movement analysis lives or dies on repeatability. A model comparing your footwork across sessions needs the same framing, the same height, and the same frame rate each time, otherwise it's comparing noise instead of progress. Filming from a different angle every week defeats the purpose before the analysis even starts.
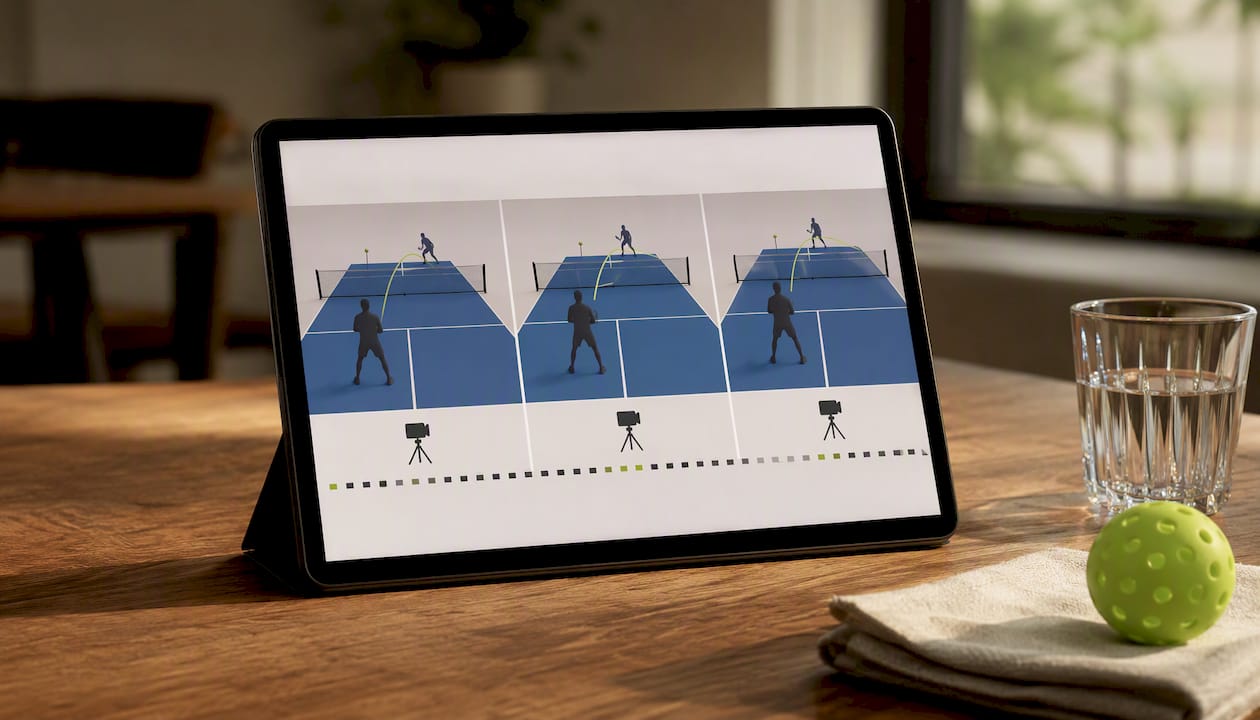
Playonpickle's AI-driven platform is built around exactly this kind of consistent, high-quality footage, analyzing movement patterns to flag stress points and biomechanical risk before they turn into overuse injuries.
A short checklist for AI-ready clips: pick one angle, baseline or side, and keep using it; film at 60 fps minimum; make sure players are clearly identifiable in frame; and use a stable, tethered mount so the footage isn't fighting camera shake on top of everything else. And a quick reminder that matters at any shared court: get consent before recording other players, and check your facility's own recording policy first.
My Take: Start Simple, Improve the Setup Later
The best starter setup is boring on purpose: phone on a tripod behind the baseline, raised until the nearest player stops blocking the far court. Pack light, phone, tripod or magnet mount, a ball joint, a power bank, and a bungee cord, and you're covered for almost any court.
Don't wait for the perfect rig before you hit record. A slightly imperfect clip you actually review beats a flawless setup you never got around to using.
— Drona
Turning Filmed Sessions Into Injury-Prevention Insights
An AI-driven platform can analyze pickleball video to read movement patterns and provide insights beyond simple replay. Its computer vision engine scans your clips for the stress points that lead to overuse injuries, then turns that into personalized exercises you can actually fit into a normal week.
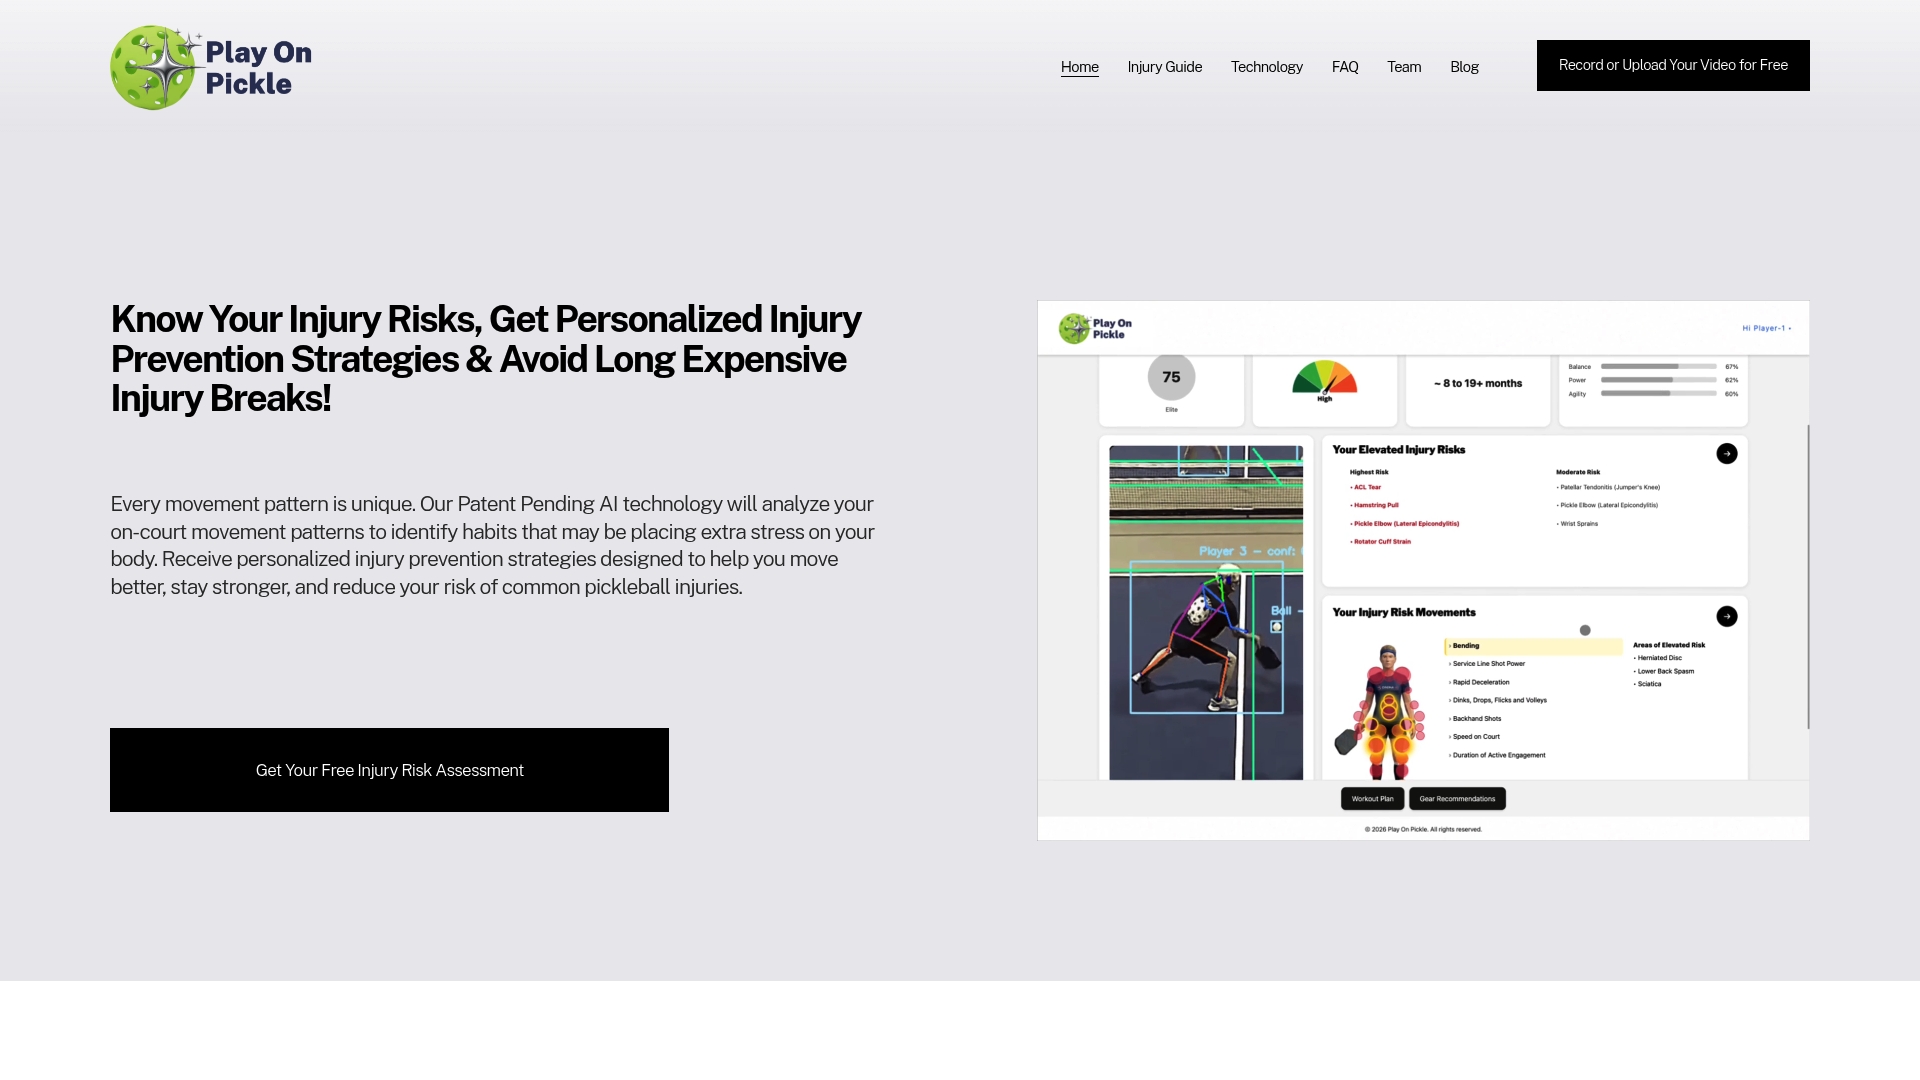
Use the baseline or side-court setup covered above, keep your settings consistent, and you already have footage that's ready for real analysis instead of just casual rewatching. Before you upload anything filmed at a shared court, get consent from anyone else in frame and check your facility's recording rules. When your clips are ready, start a trial with Playonpickle and see what your own movement patterns are telling you.
Sources
- How to Record Pickleball Games: Best Camera Setup — PickleTip
- Shooting Pickleball Video — George Murphy
- Filming yourself playing pickleball: Fix mistakes fast — The Dink Pickleball
FAQ
What's the single best camera angle for pickleball?
Behind the baseline, centered, at 7 to 10 feet high is the most useful default because it keeps every line, both players, and the whole rally in frame for positioning and shot-pattern analysis.
What is the hardest shot to hit in pickleball?
The third shot drop is widely considered the hardest shot to master, since it demands soft touch and precise depth control under pressure right after the serve return. A side-court camera angle is the best way to actually study your contact point and paddle path on that shot.
How many camera angles do I really need to film pickleball well?
One angle, the baseline view, covers most match and positioning analysis. Adding a second side-court camera is worthwhile once you want to break down stroke mechanics or track movement patterns for injury prevention.
What frame rate should I use for pickleball video?
1080p at 60 fps works for the vast majority of match footage. Save 120 to 240 fps for short slow-motion clips of a single stroke, since filming a full session at that rate drains storage and battery fast.
Do I need special equipment to film pickleball for analysis?
No. A phone, a tripod, and a ball joint mount cover almost every filming need, and a simple static baseline shot already gives Playonpickle's movement analysis enough to work with.