
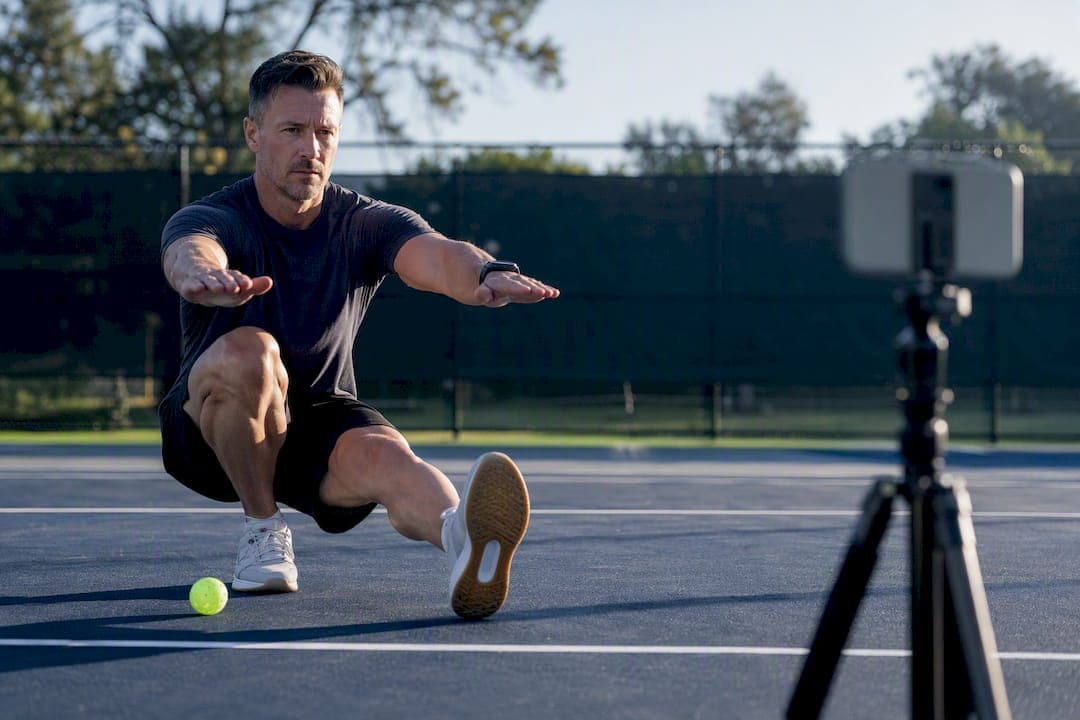
A pickleball readiness test is a markerless, video-based movement screening that flags biomechanical stress points before they turn into injuries. The quick verdict: yes, it's worth running. With 51.2 percent of players reporting nagging, non-time-loss injuries and neuromuscular training shown to cut high-risk knee injury rates by up to 62 percent, a 10 to 15 minute smartphone protocol like the one Play On Pickle runs is cheap insurance. No camera handy? Do a proper dynamic warm-up before you step on the court instead of skipping the check entirely.
TL;DR:
- Nearly half of pickleball players report injury complaints within a year, with knees, shoulders, and elbows being the most common problematic joints.
- Markerless AI screening can detect risky movement patterns with high accuracy, but it remains a trend-tracking tool, not a clinical diagnosis.
- A proper readiness test requires minimal equipment, a 15-minute setup, and should include specific movement drills like modified T-tests and single-leg landings.
- Flagged results usually indicate weakness in hip control or neuromuscular reactions, suggesting targeted corrective exercises rather than diagnostic conclusions.
- Regular retesting, ideally quarterly or after injuries, helps track progress and prevent injury by addressing mechanical faults early.
Table of Contents
- What a pickleball readiness test actually checks
- How markerless AI screening reads your movement
- How to run your own pickleball readiness test
- What to do when your test flags a problem
- Warm-ups and corrective moves for the faults you'll actually find
- Testing cadence matters more than the test itself
- Get your own AI readiness test from Play On Pickle
- Sources
What a pickleball readiness test actually checks
This isn't a skill quiz about your dink placement or third-shot drop. A readiness test looks at how your joints move under load, not how well you play. It's a screen for injury risk, not a rating of ability.
The case for running one is in the numbers. In a nationwide study of nearly 1,800 players, a high proportion reported some injury complaint over 12 months, with the knee the single most frequently hurt joint. Shoulders and elbows followed close behind. That pattern lines up with how the sport actually moves you: constant short lunges, sudden backward retreats to cover lobs, and rapid changes of direction that classic tennis screening was never built for.
The mechanical load backs this up. Video analysis comparing the two sports found pickleball players rack up far more at-risk Achilles tendon movements per ankle during play than tennis players (mean 97.59 versus 68.39), a statistically significant gap. Common trouble spots a readiness test should watch for:
- Knee valgus (inward buckling) on landing and pivoting
- Achilles and calf strain from repeated short sprints
- Shoulder and elbow overload from overhead and forehand volume
- Ankle instability during backward recovery steps
How markerless AI screening reads your movement
A phone camera and a pose-estimation model can now pull out the same kinds of signals a motion-capture lab used to charge thousands for. The core metrics worth tracking are dynamic knee valgus angle, knee flexion gain during landing, left-right asymmetry, trunk lean, stabilization time after a cut or jump, and a running count of repetitive lower-extremity stress movements.
By the numbers: One markerless model built to flag unsafe landings hit 87.3 percent classification accuracy with 90.1 percent sensitivity, and separate ACL-focused video analysis reached an ROC AUC of roughly 0.88, meaningfully better than chance at telling risky landings from safe ones.
Those numbers come with real limits. A single camera angle can miss rotation the lens doesn't see head on, lighting and camera height change joint-angle readings, and no phone-based screen replaces a clinical exam. Think of it the way you'd think of a home blood pressure cuff: useful for tracking trends and catching outliers, not a diagnosis.
- Dynamic knee valgus: inward knee collapse during landing or cutting
- Stabilization time: how long it takes to stick a landing without wobble
- Bilateral asymmetry: left leg versus right leg movement differences
- Repetitive stress counts: how often a joint hits an at-risk pattern per session
How to run your own pickleball readiness test
You need a smartphone, a tripod (or a stack of books), and about 15 minutes of open court.
Setup:
- Mount the phone at hip height, roughly 8 to 12 feet back, angled to capture both a frontal view and a sagittal (side) view across two passes.
- Shoot in daylight or bright indoor light, and film in at least 30 frames per second so fast cuts don't blur into mush.
- Wear fitted, contrasting clothing so joint lines are easy to pick out against the background.
- Do one calibration pass standing still, arms out, before you start moving.
Test battery:
- Modified T-test: sprint forward, cut laterally twice, then backpedal to the start. This mirrors the change-of-direction demands tied to reported falls in recreational players.
- Backward reactive step: have a partner call "back" at random; record how fast and how controlled your retreat and recovery lunge look.
- Single-leg landing: jump and land on one leg, holding the landing frame for the first 200 milliseconds, the window most landing-fault research analyzes.
- Forehand drive capture: film five forehand drives from the side to check for a stiff, locked arm swing or delayed follow-through.
Have a spotter present for the single-leg landing and backward step. You're testing balance under fatigue, and a stumble on hard court is not the point.
Pro Tip: Run the test twice, once fresh and once after a 10-minute rally, since fatigue is often when valgus angles and stabilization times quietly get worse.
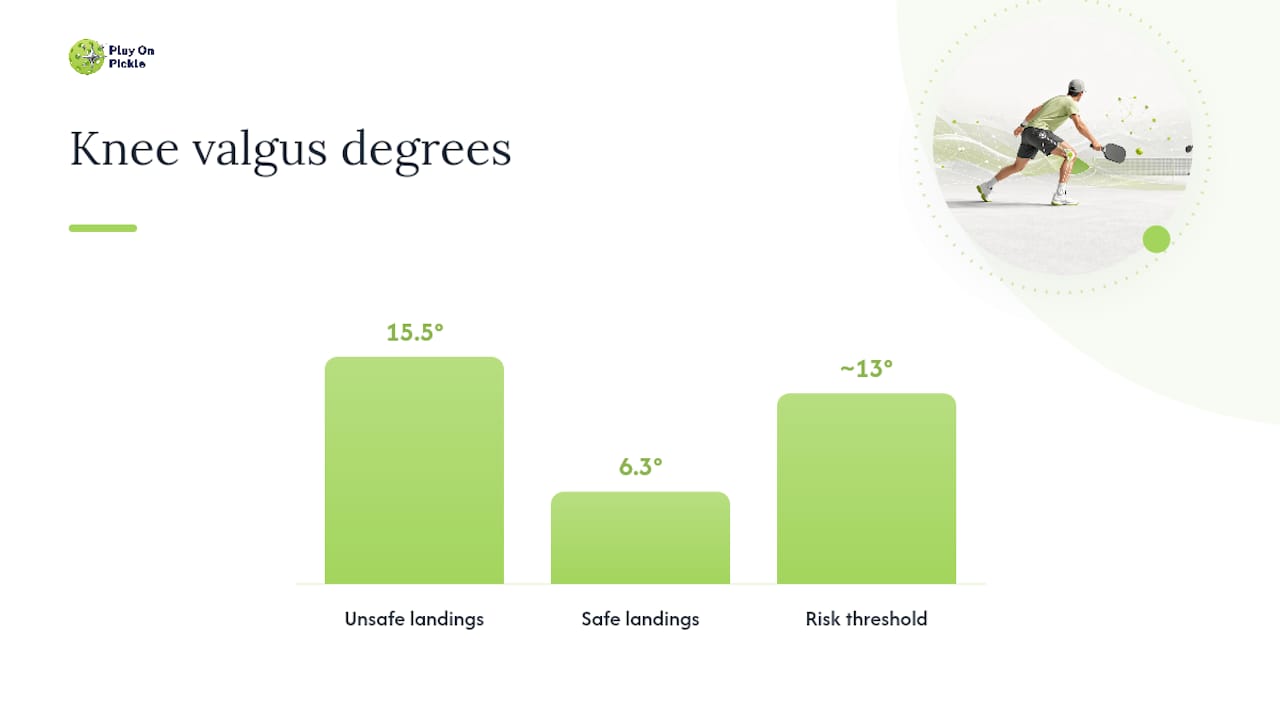
Flag anything close to these thresholds: knee valgus beyond roughly 13 degrees, stabilization time past half a second, or a change-of-direction time noticeably slower than your own baseline.
What to do when your test flags a problem
A flagged metric isn't a diagnosis. It's a signal that a specific joint pattern needs attention before you add more volume.
Wide knee valgus on landing or a stabilization time creeping past half a second usually points to weak hip and glute control rather than a structural problem. One prototype screening tool found unsafe landings averaged 15.5 degrees of peak knee valgus against 6.3 degrees for safe ones, a 9-degree gap that's large enough to matter. Slower change-of-direction times paired with hip abductor weakness track closely with players who report falls.
- Ease off high-speed backward coverage and hard lateral lunges for a week or two.
- Extend your warm-up and drop match intensity by one notch until the metric improves.
- Build a short neuromuscular focus block: hip strength, landing mechanics, single-leg control, three sessions a week.
- Stop and see a clinician for any sharp pain, joint locking, or swelling that doesn't settle within 48 hours.
| Flag | Likely cause | First move |
|---|---|---|
| Knee valgus over ~13° | Weak hip abductors, poor landing control | Add hip-focused corrective work |
| Stabilization time over 0.5s | Delayed neuromuscular reaction | Single-leg balance drills |
| Slower COD vs. baseline | Fatigue or strength deficit | Reduce lateral/backward court coverage |
| Marked left-right asymmetry | Prior injury compensation | Clinician evaluation before returning to full pace |
Warm-ups and corrective moves for the faults you'll actually find
A 5-minute warm-up covers the basics: ankle circles, walking lunges, lateral shuffles, and a set of bodyweight squats to wake up the hips before anything explosive happens. The 10-minute version adds banded lateral walks, backward skips to prime the exact retreat pattern the T-test measures, and a few controlled single-leg landings to rehearse good mechanics before match speed.
Once you know your fault pattern, train it directly:
- Knee valgus: hip abductor band walks, multiple sets of several repetitions each direction.
- Slow stabilization: single-leg balance with a reach, progressing from stable ground to a pillow or foam pad.
- Achilles overload: eccentric calf raises, three sets of 12, done slowly on the way down.
- Elbow strain from forehand faults: eccentric wrist and forearm loading with a light dumbbell, two sets of 15.
Slot one corrective block into two or three practice sessions a week, and only add load or speed once the movement looks clean on video, not just once it feels fine.
Testing cadence matters more than the test itself
The screening itself is only as useful as the habit around it. A single test on day one, forgotten by week three, tells you almost nothing about the injury that's building slowly over a season.
The realistic cadence I'd recommend: a baseline test when you start taking the sport seriously, a retest every quarter, and another check any time you come back from an injury or a long layoff. Players who play three or more times a week without much regard for injury prevention carry meaningfully higher odds of getting hurt, and the research on perception and play frequency backs that up plainly: people who rate injury prevention as low priority are roughly twice as likely to report a complaint.
Don't let testing become a barrier to actually playing. If you can't film a session, do the dynamic warm-up anyway. The point of a readiness test is smarter play, not less of it. And nothing here replaces a clinician. Persistent pain, swelling, or a joint that feels unstable needs a professional look, not another video pass.
— Drona
Get your own AI readiness test from Play On Pickle
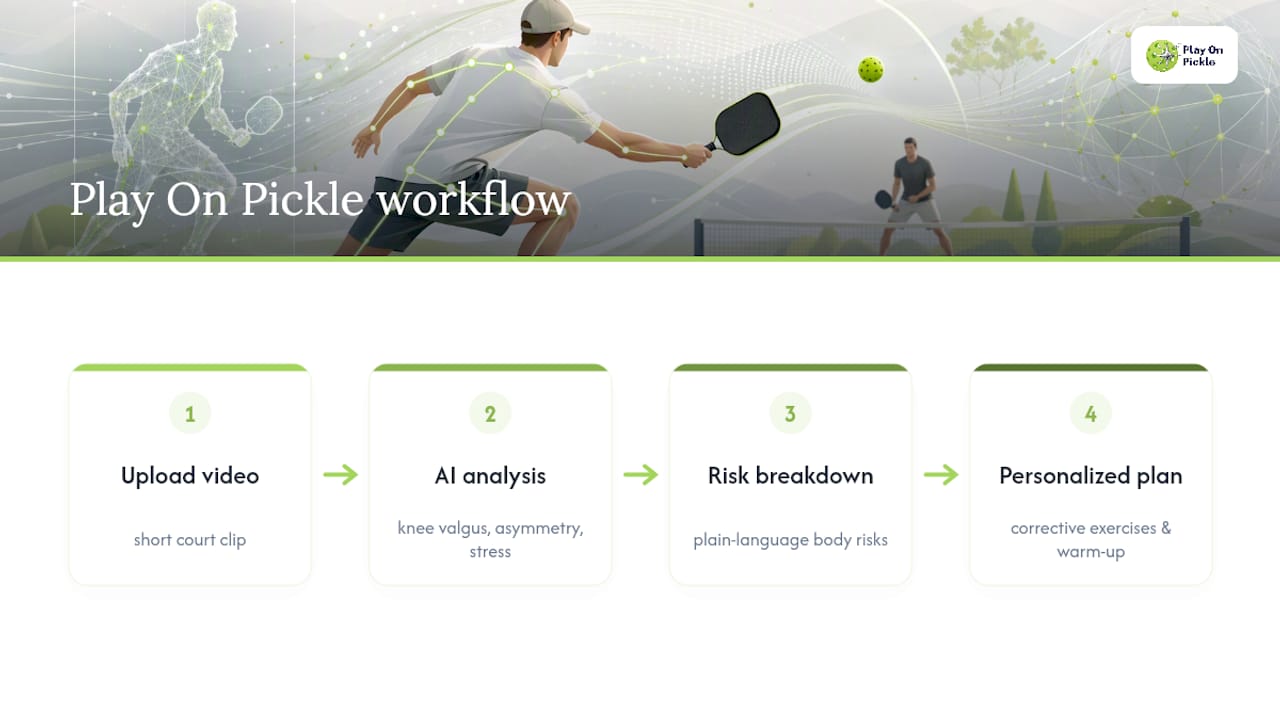
Play On Pickle offers a service where you upload a short video from your own court session, and its computer vision engine reads signals such as dynamic knee valgus, stabilization time, asymmetry, and repetitive stress patterns, turning them into a plain-language risk breakdown for your body specifically.
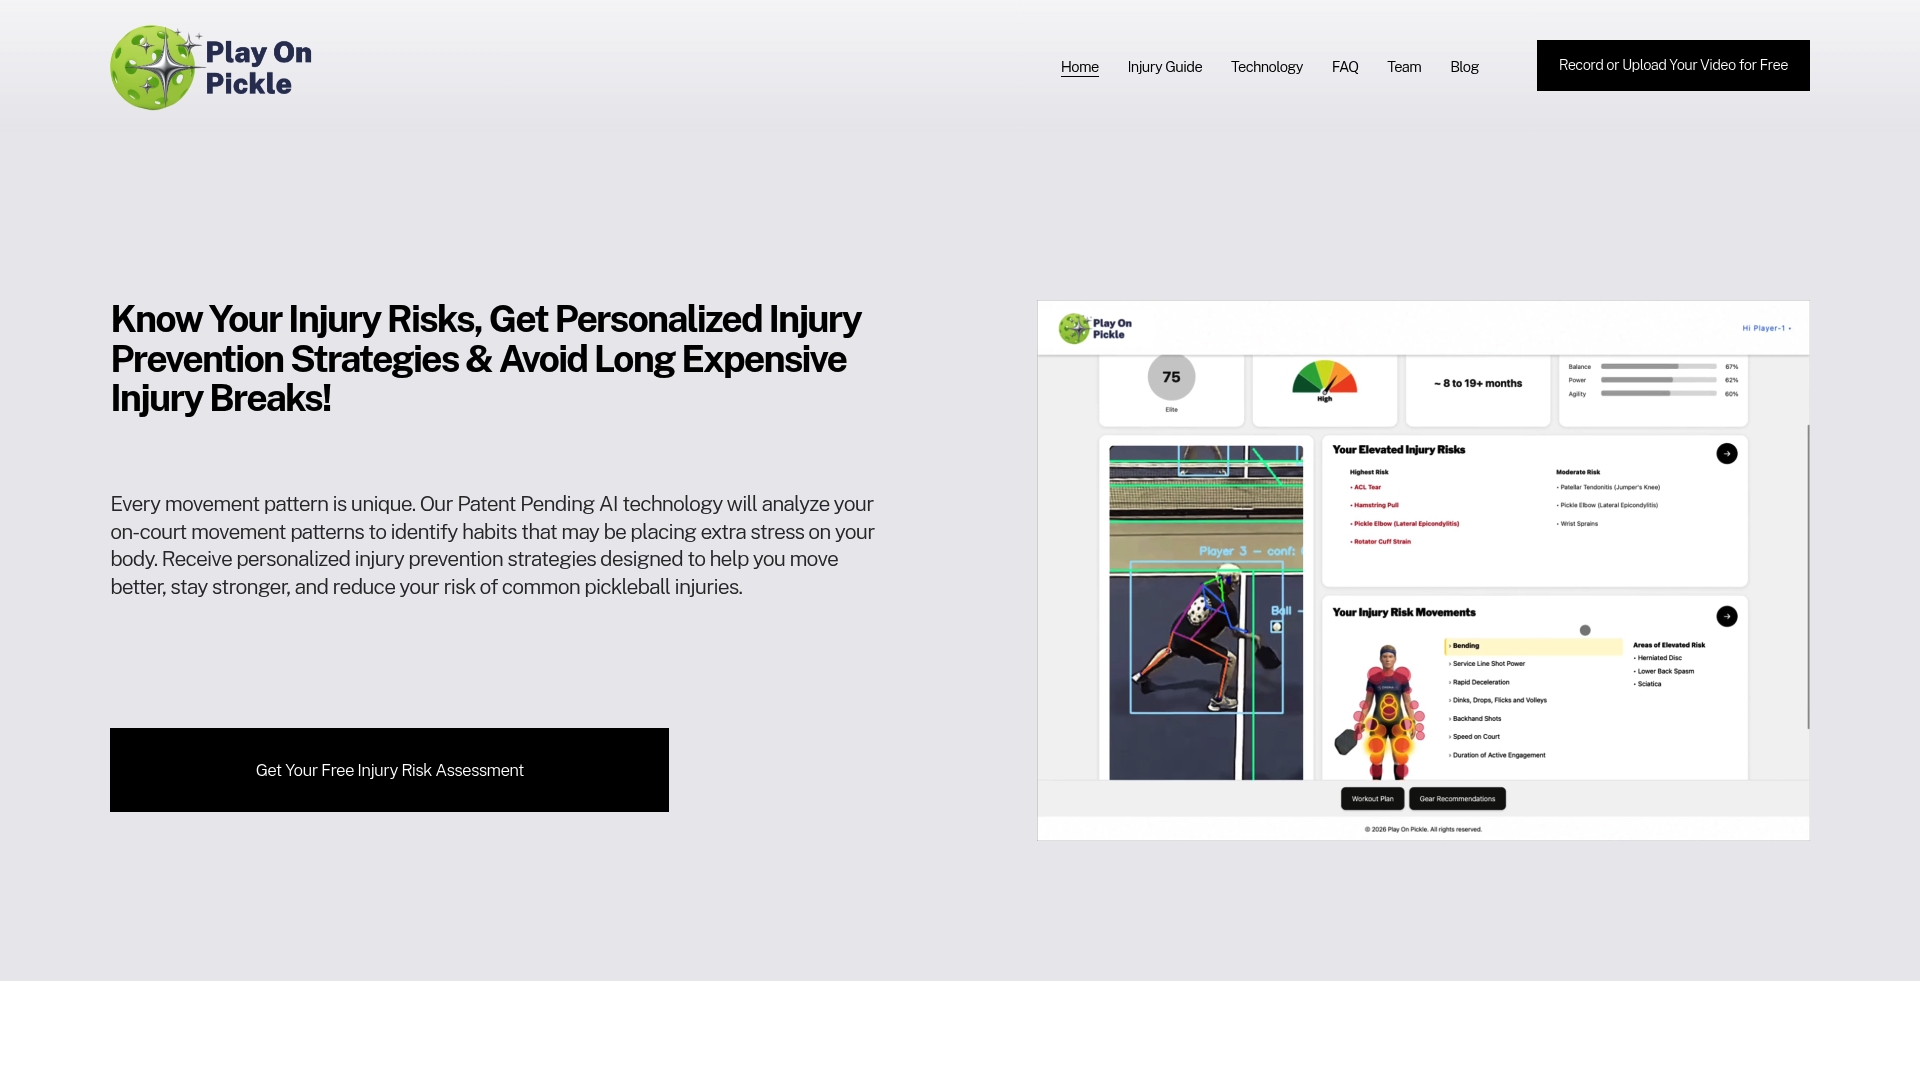
From there you get a personalized set of corrective exercises and warm-up sequences built around your actual fault pattern, not a generic list. If your test flags shoulder overload from heavy forehand volume, you get forearm and elbow-specific loading work instead of a one-size routine. If backward movement is your weak link, the plan leans into the reactive drills that actually address it, similar to the court-specific agility patterns used in structured drill formats.
Start with the free trial on the Play On Pickle landing page, upload your first clip, and see your risk breakdown before your next match.
This article is general information, not a substitute for advice from a qualified doctor. Consult a qualified healthcare professional about your own circumstances before acting on anything here.
Sources
- Understanding injury patterns and predictors in pickleball players: a nationwide study
- Comparative biomechanical demand: pickleball vs tennis (gameplay video analysis)
- Real-time biomechanical analysis for ACL injury prevention using markerless motion capture and pose estimation