
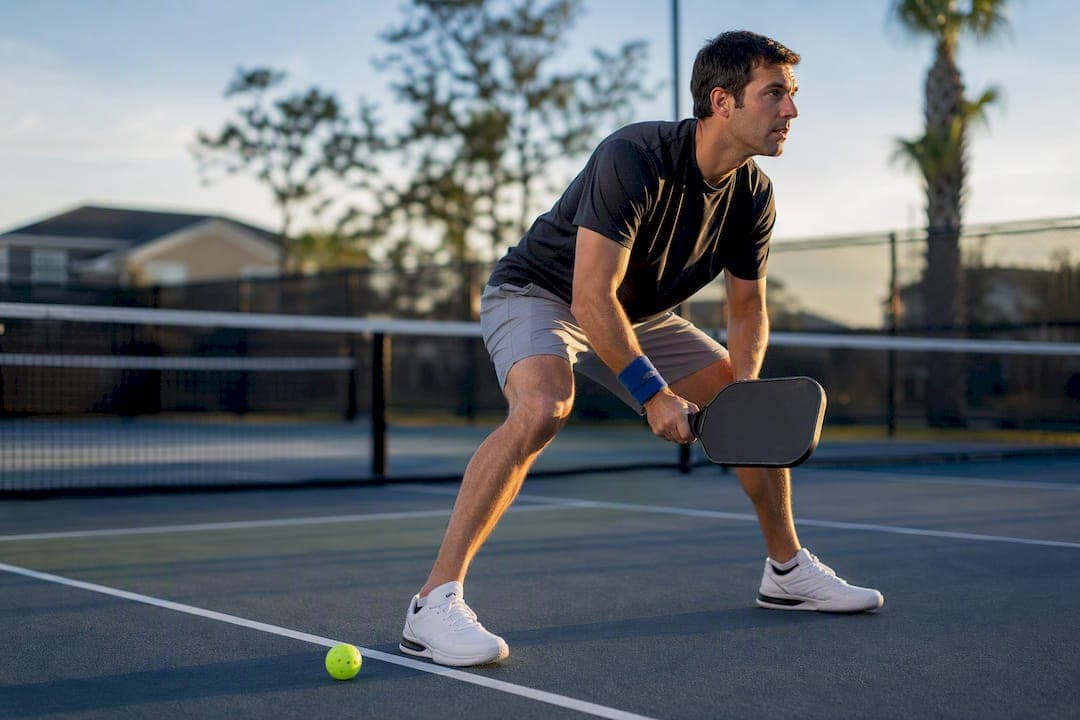
Bend your knees and hips, not your waist. Keep your paddle out in front of your chest, and meet the ball in front of your lead hip with a short push, not a swing. That single adjustment fixes most of the pop-ups, shanks, and back twinges recreational players fight at the kitchen line. Match your stance height to the ball rather than freezing in one deep squat, and try the drill later in this guide to make it automatic.
TL;DR:
- Proper dink posture relies on bending the hips and knees to keep the spine neutral, reducing back strain and improving shot accuracy.
- Contact should be made in front of the lead hip, matching the ball's height, with a paddle face angle of 15 to 30 degrees for controlled net clearance.
- Fast, small footwork steps and early read of the shot are critical to arrive in the correct position and generate consistent, low contact points.
- Loosening grip pressure and minimizing wrist flicks help maintain control and prevent pop-ups during exchanges.
- Regular drills focusing on stance, contact, and footwork, along with movement analysis if needed, significantly improve posture and reduce injury risk over time.
Table of Contents
- What Does Correct Pickleball Dinking Posture Look Like?
- Where Should You Make Contact With the Ball?
- How Should You Move Your Feet Between Dinks?
- What Grip and Swing Produce a Reliable Dink?
- What Are the Most Common Dinking Mistakes?
- Which Drills Build Better Dinking Posture Fast?
- Why Does Dinking Posture Matter for Injury Prevention?
- What Should You Fix First With Limited Practice Time?
- Want Faster, Personalized Posture Fixes?
- Sources
- FAQ
What Does Correct Pickleball Dinking Posture Look Like?
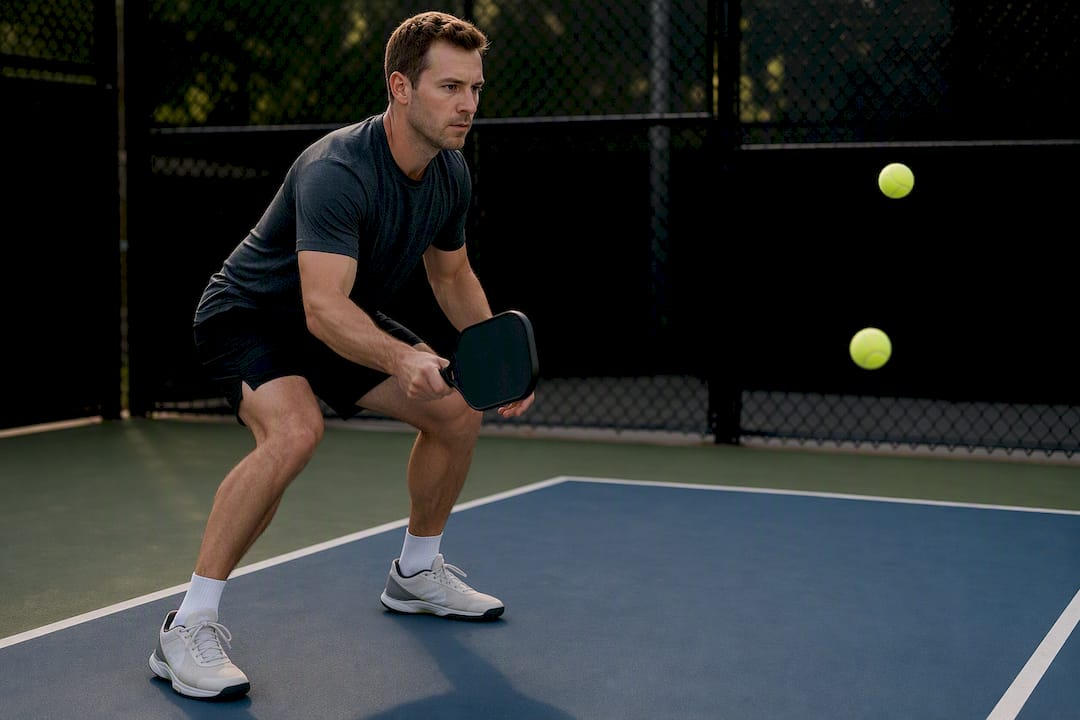
Good dinking posture starts at the hips, not the waist. Lower your center of gravity by bending your knees and hinging at your hips, and keep your spine in a neutral, mostly upright line. This is the single biggest fix instructors point to, because bending at the waist is the most common technical error in recreational dinking, and it is the one most tied to shanked balls and lower back pain.
Think of your stance height like an elevator rather than a fixed setting. You do not need to sit in a deep squat for every single dink. Instead, adjust your posture to match the incoming ball: rise slightly for a ball that arrives near shoulder height, hold a moderate knee bend for a ball crossing at net height, and drop deeper through the hips only when the ball comes in low. This dynamic adjustment saves energy over a long match and keeps you from folding at the waist to chase low balls, which is exactly the movement that strains your lower back.
A few checkpoints worth locking in at the non-volley zone line:
- Weight rides forward on the balls of your feet, not back on your heels.
- Chest stays slightly proud, so your paddle naturally sits out in front of your body.
- Stance sits around shoulder-width. Too narrow and you cannot move; too wide and you cannot react.
- Small, constant micro-adjustments keep you balanced instead of locked in place.
Avoid what one instructional piece bluntly calls the tin man stance, where your feet sit too close together and your knees barely bend. That stiff posture might feel stable standing still, but it kills your ability to move laterally when a speed-up or angle change comes your way.
Pro Tip: Set your ready position between every single point, not just at the start of a rally. Players who reset their stance after each shot recover their dinking posture almost automatically by the time they hit the next drill.
Where Should You Make Contact With the Ball?
Meet the ball in front of your lead hip, somewhere between that hip and your lead foot. That contact zone lets you push through the ball with your body behind the shot instead of scooping at it with your arm alone. UTR Sports calls this out directly: letting the ball drift behind your body forces an arm-heavy, last-second swing that sends the ball popping up rather than staying low.
Your paddle face angle matters just as much as timing. Open the face somewhere between 15 and 30 degrees. That's enough loft to clear the net with margin, without giving your opponent a high, attackable ball.
- Paddle face too closed: the ball drives into the net or skids too low.
- Paddle face too open: the ball floats high and sits up for a smash.
- Paddle face at 15 to 30 degrees: a controlled arc that clears the net and drops in the kitchen.
Instructors and coaches consistently point to posture and foot placement as the deciding factor in dink consistency, more than hand speed or paddle skill. Late contact usually traces back to late feet. If you're reaching for the ball as it passes your body, your feet arrived too slowly, and no amount of wrist adjustment fixes that after the fact. The remedy is simple to describe and harder to drill: get your feet moving the instant you read the shot, so contact happens early and in front, every time.
How Should You Move Your Feet Between Dinks?
Footwork drives everything else in this guide. You can have perfect knee bend and a textbook grip, and none of it matters if your feet arrive late.
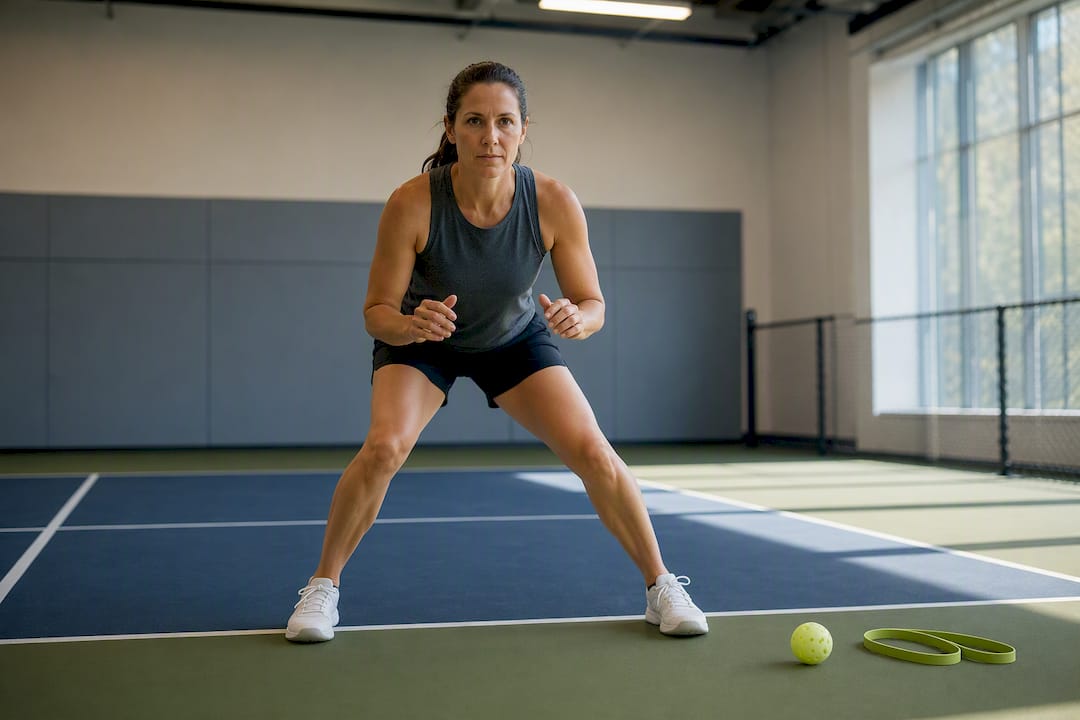
- Read the shot early and move your outside foot first, getting it to the ball before your body has to reach.
- Aim to catch the ball inside what coaches call the cone of power, the space directly between your two feet where your body can generate a clean, balanced push.
- Sidestep to adjust position rather than crossing one foot over the other. A crossover step commits your weight in one direction and slows your recovery for the next shot.
- Keep steps small and quick, staying on the balls of your feet rather than flat footed.
- Widen or narrow your stance slightly depending on how much lateral coverage the point demands.
One breakdown of common technical flaws found that legs and foot positioning account for roughly 80% of dink consistency, with soft hands doing almost nothing to compensate for feet that arrive in the wrong spot. That statistic reframes how most recreational players practice. Hours spent drilling paddle angle in isolation matter less than a few minutes spent training your feet to move first.
Pro Tip: Practice shadow footwork without a ball for two minutes before you play. Step side to side, staying low through the hips, and get your outside foot moving on an imaginary cue. It feels awkward at first and becomes automatic within a session or two.
What Grip and Swing Produce a Reliable Dink?
Start with a Continental grip, the same grip you'd use to shake hands with the paddle face vertical. It's the grip most instruction defaults to for dinking because it keeps the paddle face naturally open enough to lift the ball without forcing your wrist into an awkward angle.
Grip pressure matters more than grip style. Hold the paddle at roughly a 2 to 4 out of 10 on a tightness scale, loose enough that you could wiggle the paddle slightly if someone tried to take it from your hand. A tight grip transfers extra energy into the ball on contact, which is exactly what turns a soft dink into a pop-up your opponent smashes.
- Keep the motion short: a compact push from the shoulder and elbow, not a full swing.
- Quiet the wrist. It should stay stable through contact rather than flicking or snapping.
- Follow through just slightly forward, guiding the ball rather than striking it.
- Skip the backswing almost entirely. Dinking rewards a short, controlled motion over a long, powerful one.
One useful mental cue from coaching instruction: think "guide the ball" instead of "hit the ball." That single word swap reframes the shot as a compact, shoulder driven push and removes the temptation to add wrist action you don't need.
What Are the Most Common Dinking Mistakes?
Most dinking problems trace back to one of three habits, and each has a quick fix you can apply mid-game.
- Bending at the waist instead of the knees and hips. Fix it by initiating your descent from the hips before the ball arrives, not by folding forward once it's already close.
- Reaching for the ball instead of moving your feet. Fix it by cueing yourself to step first, then swing. If you catch yourself extending your arm, your feet were late.
- Gripping the paddle too tightly. Fix it by consciously loosening your hand between points. A death grip almost always shows up as a pop-up on the next shot.
- Making contact late or behind the body. Fix it by watching where your paddle meets the ball. If contact happens beside or behind your hip instead of in front, back your positioning up a half step.
A short mental checklist between points covers most of this: feet set, contact point in front, grip loose. Run through those three in the two or three seconds before the next serve, and you'll catch bad habits before they cost you the rally.
Which Drills Build Better Dinking Posture Fast?
Posture knowledge only sticks once your body practices it under real conditions. These four drills, run in order, build the whole chain from stance to contact point to recovery.
- Sustained kitchen rally. Both players stand at the non-volley zone line and dink back and forth, focusing only on contact in front of the lead hip and a short, compact swing. The goal isn't winning the point, it's keeping the rally alive for 20 or more shots.
- Protect the Castle. Set targets or cones in the kitchen and defend your side by forcing every shot to land short. This drill punishes late contact and reaching, since a mistimed dink sails long almost every time.
- Two-ball elevator drill. A partner alternates feeding balls at different heights, high, medium, low, and you adjust your stance height to match each one instead of holding a single fixed squat.
- Footwork beat-the-ball drill. A partner feeds dinks slightly off to one side, and you practice getting your outside foot to the ball before your paddle swings. This builds the muscle memory that footwork drills are ultimately training for.
A 15 to 20 minute session that runs each drill for four or five minutes covers the full chain: posture, contact, footwork, and recovery. Sustained rallies and Protect-the-Castle in particular force correct positioning and swing mechanics simultaneously, which is more efficient than isolating one skill at a time.
Pro Tip: Run the two-ball elevator drill first in your session, while your legs are fresh. Matching stance height to ball height gets sloppy fast once fatigue sets in, so train it early.
Why Does Dinking Posture Matter for Injury Prevention?
Posture isn't just about winning the point. It's about what your joints absorb over hundreds of dinks a session.
Lowering through your knees and hips spreads the load across your largest muscle groups, your quads and glutes, instead of concentrating force on your lumbar spine. Folding at the waist does the opposite: it loads the lower back on every single low ball, and that repeated strain adds up over a season, especially for recreational players who skip a structured warm-up.
Consistent contact in front of your body also protects your shoulder and wrist. When contact happens late, your arm has to compensate for a body that arrived too slowly, and that compensation pattern is a common source of overuse injuries in dinking-heavy players. A few minutes of hip, glute, and thoracic rotation mobility work before you step on court supports the posture this guide describes and helps your body actually hold that position for a full match. Simple hip mobility drills built for lifters transfer surprisingly well here, since the same hinge pattern that protects a squat protects a dink.
Chronic, low-grade stress rarely announces itself with a single sharp pain. It shows up as a stiff lower back after three matches in a row, or a wrist that aches by the third set, long before it becomes something that sidelines you.
This is where movement analysis earns its place in a player's routine rather than staying a one-time curiosity. Play On Pickle's video-based assessment looks at exactly these patterns, flagging where a player's mechanics concentrate stress, so corrections target the actual cause rather than a guess. For more on the injuries this kind of stress produces, see how pickleball hip pain develops and how to address it.
What Should You Fix First With Limited Practice Time?
If you only have twenty minutes on a court before a game, fix your feet first. Contact point comes second, and grip pressure comes third. Feet solve most posture problems on their own, because you can't get your hips and knees into the right position if you're a full step away from the ball.
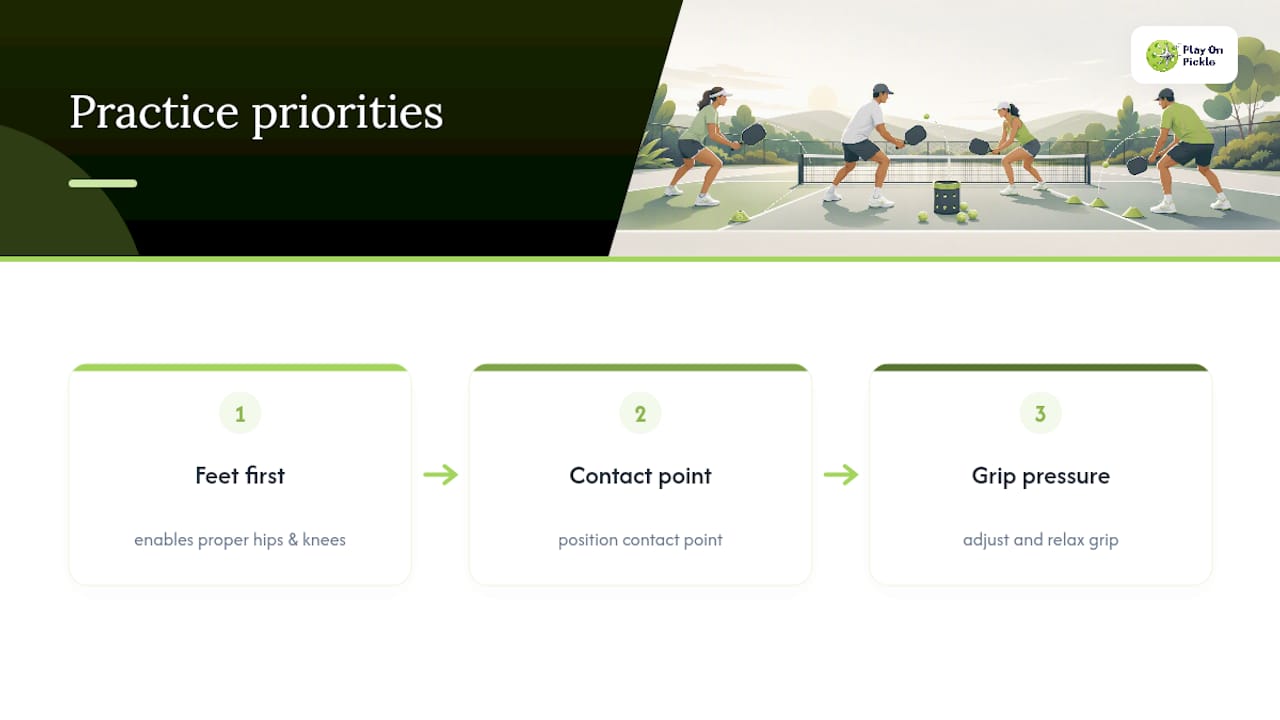
A fast between-game check: for two minutes, dink with a partner and silently run through feet, contact, grip on every third shot. It sounds slow. It isn't, once it's a habit.
Run the footwork and elevator drills twice a week and expect visible improvement in three to four sessions, not overnight. Posture change is a motor skill, not a switch you flip.
— Drona
Want Faster, Personalized Posture Fixes?
If you've been guessing at your own footwork or asking a partner to eyeball your knee bend, there's a more precise way to check it. A service analyzes your actual movement on video, flags where your dinking posture is putting stress on your hips, back, or wrists, and hands you specific exercises built around what your body is actually doing, not generic drills copied from a coaching manual.

A first assessment works well for players coming off a nagging ache or anyone who wants to know whether their stance is protecting their joints as well as it should. You upload video from your own court session, the analysis flags stress points tied to your dinking mechanics, and you get a plan built around your specific patterns instead of a one-size-fits-all fix. If your lower back tightens up after long rallies or your wrist feels off by the third game, that's worth checking before it becomes a bigger problem. Start with a free trial at Play On Pickle and see what your own movement data shows.
FAQ
What is the best way to dink in pickleball?
Bend through your knees and hips with a neutral back, keep your paddle out in front, and make contact in front of your lead hip using a short, compact push rather than a full swing.
What is the 10 second rule in pickleball?
The 10 second rule requires the serving team to serve within 10 seconds of the score being called; it governs pace of play, not dinking technique.
Is dinking more important than power?
At the recreational and intermediate level, consistent dinking usually wins more points than power shots, since a well-placed low dink forces errors and limits your opponent's attacking angles.
Why do pickleball players dink so much?
Dinking keeps the ball low and inside the kitchen, which prevents opponents from smashing it and forces a patient exchange where the first player to make a mistake usually loses the point.
How can I tell if my dinking posture is causing injury risk?
Recurring lower back stiffness or wrist soreness after sessions often points to waist-bending or late contact rather than normal fatigue, and a movement analysis tool like Play On Pickle can pinpoint the exact stress pattern.