
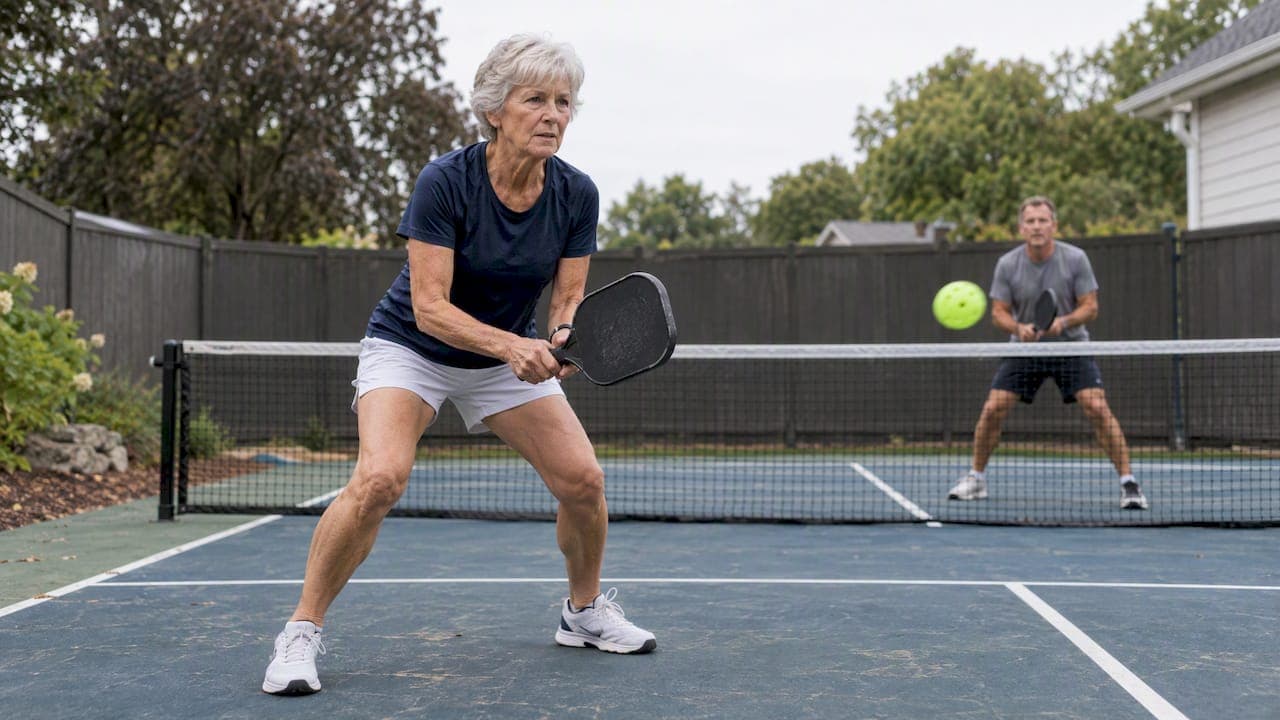
A reaction-optimized ready position puts your paddle in front at working height, your knees bent, your weight on the balls of your feet, and your elbows soft rather than locked. This compact, loaded posture shortens the distance your body has to travel before it can push, shuffle, or block, which is what actually makes you faster to the next ball.
TL;DR:
- Time your split step so you are airborne at opponent contact and land as the swing ends; practice with partner feeds at varied times.
- Keep the paddle near belt height at the baseline, then raise it forward near the kitchen with backhand bias around 10 to 11 o’clock.
- Start with 10 to 15 slow repetitions, increase the pace once your posture holds automatically, and add unpredictable live points only afterward.
- Shuffle laterally instead of crossing your feet, and recover the paddle forward after every shot to stay balanced and ready for another direction change.
Table of Contents
- 5-point ready position checklist you can run between points
- Paddle placement and grip: how to hold the paddle by zone
- Footwork and stance: split-step, shuffle, and flowing between stances
- Zone-specific adjustments: baseline, transition, kitchen
- Drills to train the ready position under realistic tempo
- Evidence and testing: what research and coaching guidance say
- Why core stability and posture hold the ready position together
- Common mistakes and how to correct them in the ready position
- Integration of breathing techniques to enhance focus and endurance while in the ready position
- Author perspective: the one habit worth prioritizing this week
- Try a recorded readiness test to spot ready-position gaps
- FAQ
- Sources
5-point ready position checklist you can run between points
Most players lose reaction time between points, not during them. Resetting these five checkpoints every time the ball goes dead keeps your body loaded instead of standing flat-footed.
- Paddle face neutral or tilted slightly toward a backhand bias, held in front where you can see it in your lower peripheral vision.
- Grip pressure light, like holding a continental grip on a tool you don't want to crush, with elbows soft instead of locked.
- Base athletic: knees bent, weight shifted forward onto the balls of your feet rather than the heels.
- A small split-step timed to your opponent's contact, not a flat-footed stand.
- Spacing checked with your partner so neither of you is crowding the middle or leaving a gap down the line.
Paddle placement and grip: how to hold the paddle by zone
Your paddle angle should shift depending on where you're standing, not stay fixed all match. A neutral face works fine from the baseline, but as you move closer to the net, a slight backhand bias, roughly 10 to 11 o'clock for a right-hander, covers the faster counters that come at the kitchen line.
Height matters as much as angle. From the baseline, carry the paddle lower, closer to belt height, since you have more time to react. At the non-volley zone, bring it up and forward, with the paddle head above your wrist and visible in your lower peripheral vision, because reaction windows shrink to a fraction of a second there.
Grip pressure stays light throughout, somewhere around a soft hold rather than a death grip, and elbows stay soft rather than locked straight. A stiff arm telegraphs your swing and slows your block. If you notice your paddle drifting behind your hip between shots, that's usually a sign your grip has tightened or your attention has drifted to watching the ball instead of recovering your position. Resetting the paddle forward immediately after every shot, win or lose the point, fixes this faster than any drill.
For more on fixing paddle drift specifically at the net, our volley mechanics guide walks through common kitchen-line corrections.

Footwork and stance: split-step, shuffle, and flowing between stances
The split-step is the single move that connects your ready position to actual movement. The timing matters more than the hop itself: you want to be airborne the instant your opponent makes contact with the ball, landing just as they finish their swing so you're ready to push off in whichever direction the shot demands. Land too early or too late and the hop does nothing for you.
A short practice progression builds this reliably; for inspiration from a related sport, see how to scout emerging tennis talent, which emphasizes key movement and reaction skills critical in racket sports.
- Shadow the split-step alone, timing an imaginary opponent's swing until the rhythm feels automatic.
- Add a partner who tosses or feeds balls with deliberately inconsistent timing, since training against varied contact timing builds timing that holds up under match pressure, while drilling only against perfectly timed feeds makes that timing brittle.
- Progress to full points where you consciously check your split-step timing on every exchange.
Lateral movement should rely on shuffling, not crossing your feet, since a shuffle keeps your base stable and your paddle ready the entire time. Crossing your feet is occasionally necessary for a stretched backhand recovery, but it should be the exception rather than the habit.
Stance itself should flow rather than lock into one shape. An open stance suits quick reactions near the kitchen, a semi-open stance gives you a balance between reach and recovery, and a closed stance helps generate power on a setup shot. Rather than picking one "correct" stance, treating these as transitions you flow between based on the shot in front of you builds more adaptable footwork than drilling a single static pose.
Zone-specific adjustments: baseline, transition, kitchen
Your ready position tightens as you move closer to the net, because your reaction window shrinks with every step forward. At the baseline, you can afford a lower paddle and a slightly wider stance since shots take longer to arrive. In the transition zone, start raising the paddle and narrowing your base slightly, since this is where mistimed splits most often cause a ball to sneak past at the hip.
The split-step becomes critical the moment you start moving into the kitchen. A well-timed split-step at your last step forward stops your momentum before you arrive, so you land balanced rather than still drifting forward into a volley you can't control.
Once you're set at the non-volley zone, the cues compress: paddle up and slightly biased toward the backhand, held forward in your field of vision, weight on the balls of your feet, and a quick recovery back to center after every shot. Players who drift the farthest from this compact shape at the kitchen line are usually the ones who got there without ever stopping their forward momentum first.
Drills to train the ready position under realistic tempo
Ready position only holds up under pressure if you've trained it at pace, not just in a static drill.
- Shadow and mirror drills: stand in front of a mirror or a partner and hold the ready posture while they call out directions for you to shuffle toward, checking that your paddle stays forward the entire time.
- Partner-feed progression: start with slow, cooperative dinks, then add varied placement, then add speed-ups, so your split-step timing has to adjust to real unpredictability rather than a fixed rhythm.
- Split-step timing drill: have a partner feed balls while you focus only on being airborne at their contact and landing ready to push, checking afterward whether your landing matched their swing.
Build reps gradually. Start with short sets of 10 to 15 repetitions at a slow tempo, then increase pace once the posture holds automatically, and only then add the unpredictability of live points.
Pro Tip: Prop your phone on a tripod during a practice session and review the footage afterward. Watching your paddle recovery and split-step landing on video catches timing errors you won't feel in the moment. Our camera angle guide covers where to position a phone for this kind of review.
Evidence and testing: what research and coaching guidance say
USA Pickleball's coaching guidance frames the split-step as a reset mechanism: timed at opponent contact, it stops your momentum and readies your body to change direction instantly, rather than being a fixed pose you hold between shots.
A movement-pattern review comparing pickleball to other racket sports found that pickleball demands frequent lateral shuffling and short forward-backward bursts with more directional changes than tennis, which puts a premium on joint stability and deceleration control, particularly for recreational and older players managing ankle and knee stress.
For players who want to measure these mechanics rather than guess at them, a short smartphone-based readiness test using movement analysis can quantify paddle recovery speed and split-step timing from recorded video, giving a concrete baseline to track against.
Why core stability and posture hold the ready position together
Everything in the ready position checklist depends on a stable midsection. Bent knees and forward weight only work if your core keeps your torso upright and controlled, because a collapsed or overly rounded back pulls your weight back onto your heels no matter how deliberately you set your stance.
A stable core also lets your arms stay soft. When your trunk is doing the work of holding you balanced, your shoulders and elbows don't need to tense up to compensate, which keeps your paddle reactive instead of stiff. Players who round their lower back or let their hips sag tend to compensate with tight shoulders, and that tension is exactly what slows a block or a reset volley.
Posture also affects how quickly you can push off in a shuffle. A tall spine with a slight forward hip hinge, similar to an athletic stance in basketball or tennis, keeps your center of gravity over the balls of your feet. Collapse that posture even slightly and your first step toward the ball has to correct your balance before it can actually move you.
None of this requires specialized training to notice. Standing in front of a mirror in your ready position and checking whether your lower back is neutral, your chest is upright, and your weight sits forward of your heels is enough to catch the biggest posture errors before they show up as late reactions on the court.
Common mistakes and how to correct them in the ready position
The most common error shows up in exactly the moments when pressure rises: players stiffen into what coaches have nicknamed the "tin man" stance, narrowing their base and locking their knees right when a wide, bent-knee stance matters most. The fix is conscious rather than automatic at first: before a high-pressure point, deliberately widen your feet and bend your knees a touch more than feels necessary.

A second common mistake is letting the paddle drift down or behind the hip between shots, usually because attention shifts entirely to watching the ball instead of resetting position. Correcting this means building a habit of recovering the paddle to the same forward spot after every single shot, regardless of whether the point is still live.
A third mistake is skipping the split-step entirely when rushed, which leaves players flat-footed exactly when a fast exchange requires an instant direction change. Because this habit is timing-based rather than postural, it corrects fastest through repetition against a partner who varies their shot timing, not through thinking about it mid-point.
Crossing the feet during lateral recovery is a fourth common habit, usually from trying to cover too much ground in one step. Shuffling, even if it takes one extra step, keeps the base stable and the paddle ready, while crossed feet leave a player momentarily unbalanced and unable to change direction again if the shot is disguised.
Integration of breathing techniques to enhance focus and endurance while in the ready position
Breathing is an overlooked part of the ready position because it has nothing to do with posture, yet it directly affects how loose your shoulders and arms stay. Holding your breath, which many players do unconsciously during a tense rally, tightens the chest and shoulders in a way that stiffens the exact soft-elbow posture the ready position depends on.
A simple fix is exhaling briefly as you perform your split-step, similar to the short exhale a lifter uses during an exertion. This keeps the diaphragm engaged rather than locked, which in turn keeps the upper body relaxed enough to react rather than brace.
Between points, a slower reset breath, in through the nose for a couple of counts and out through the mouth, helps settle the heart rate during longer rallies or tournament play, when fatigue starts to creep into posture first. A tired player's shoulders round and their weight drifts back onto their heels well before their legs give out, so managing breathing is partly a way of managing posture indirectly.
This matters most in longer points or back-to-back games, where endurance, not raw athleticism, decides whether your ready position holds up in the third set the way it did in the first.
Author perspective: the one habit worth prioritizing this week
If you only fix one thing, make it split-step timing rather than posture. Posture is easy to check in a mirror; timing only shows up under live pace. Spend seven days doing 10 minutes of partner-fed split-step reps before every practice session, varying the feed timing each day. By day seven, you should notice fewer flat-footed moments against fast exchanges.
— Drona
Try a recorded readiness test to spot ready-position gaps
Checking your own split-step timing and paddle recovery from the outside is hard to do by feel. We built a 10 to 15 minute smartphone readiness test that analyzes recorded movement to flag where your recovery timing and posture are slipping before they turn into missed shots or strain.
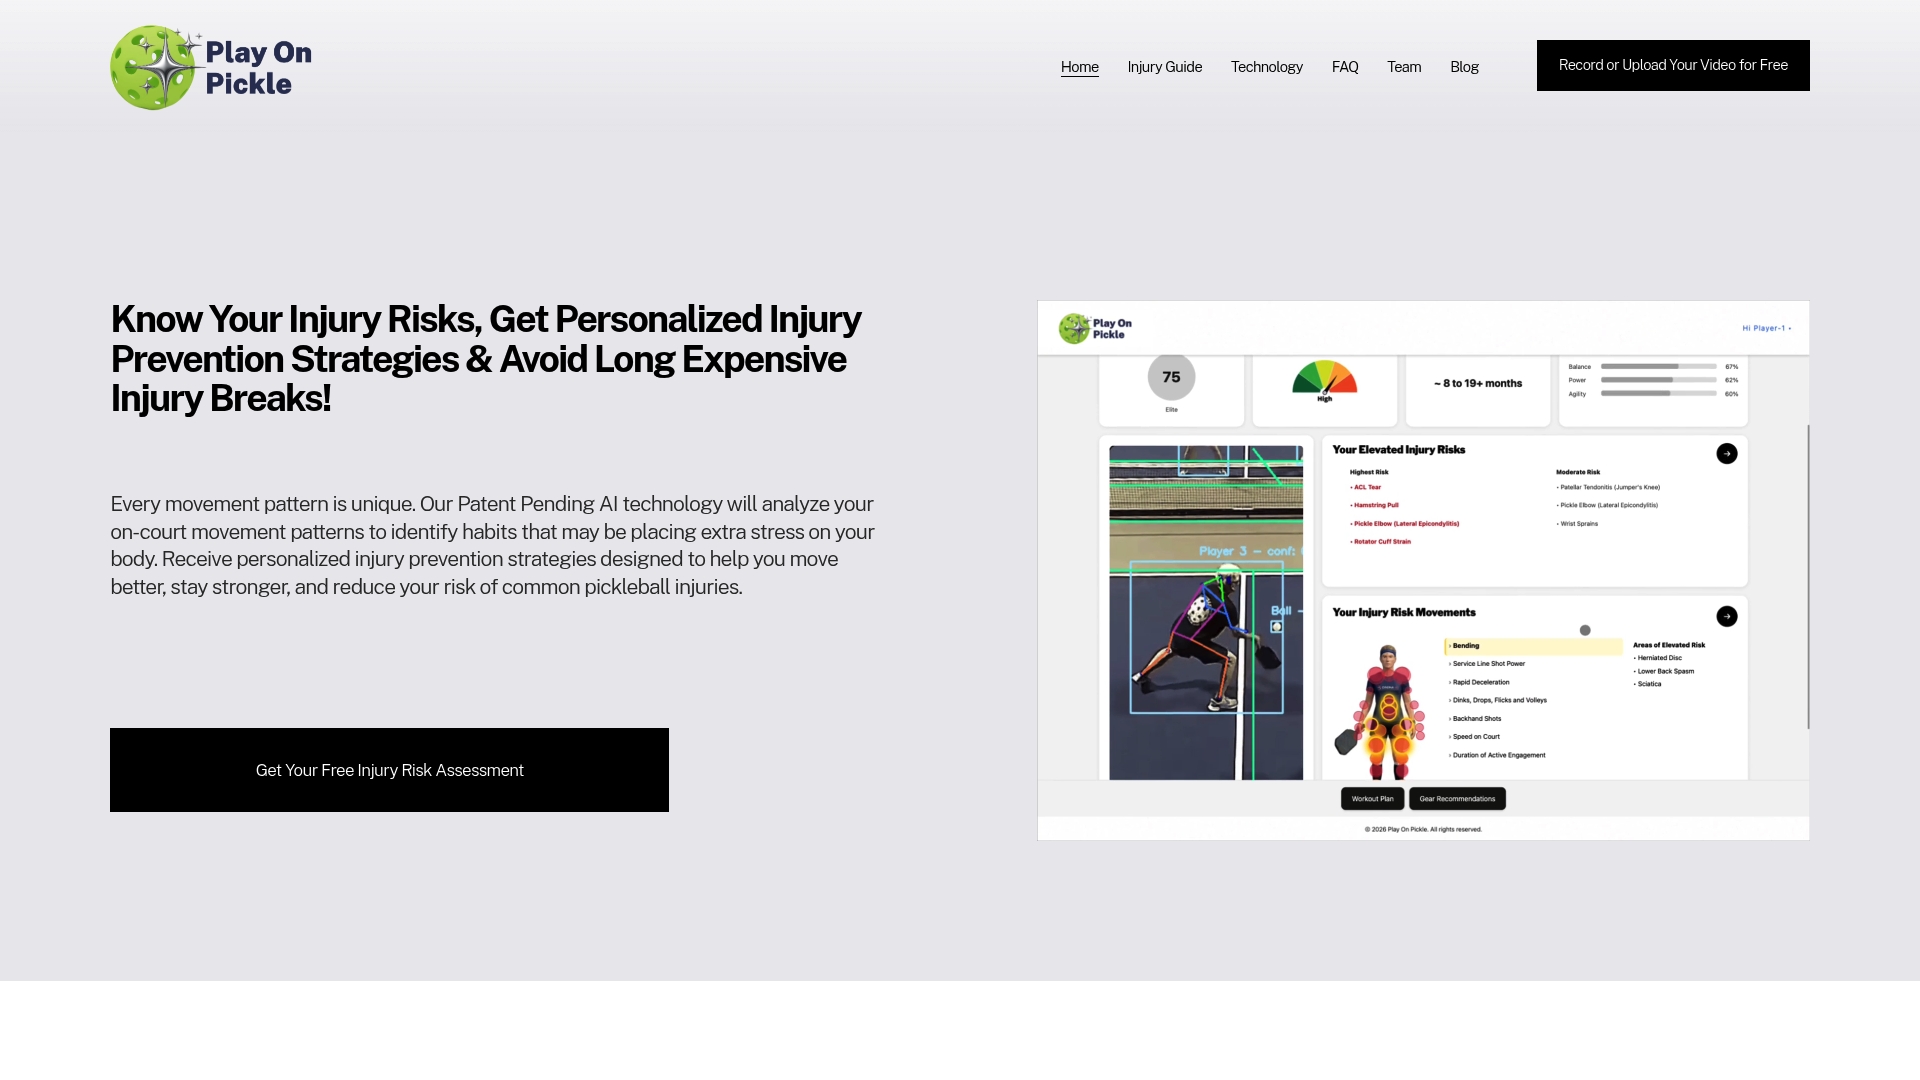
- Subscribers get ongoing analysis to track changes in their ready position over time.
- Exercises are provided to target identified stress points, designed to fit into typical practice routines.
- Plans run as a Monthly subscription at $9.99 per month or an Annual subscription at $99 per year, with a free tripod offer available for new subscribers who want to start recording practice right away.
FAQ
What is the 10 second rule in pickleball?
The 10 second rule is a serving rule that gives the server up to 10 seconds after the score is called to serve the ball, not a ready-position concept. It keeps the pace of play moving between points rather than dictating stance or footwork.
What are the 5 P's of pickleball?
There's no single official "5 P's" framework recognized across coaching sources, and definitions vary by instructor. Most informal versions reference concepts like positioning, patience, placement, power, and paddle control, but these aren't standardized terms you'll find in official rules.
How good is a 2.5 pickleball player?
A player at a beginner-intermediate level has basic control of forehand and backhand shots and understands fundamental positioning, but is still developing consistency, especially around the kitchen line and under faster exchanges. At this level, ready-position habits like split-step timing and paddle recovery are often inconsistent rather than automatic.
What is the hardest serve to return in pickleball?
The serves that cause the most trouble tend to be deep, spin-heavy serves aimed at a returner's backhand, since they shorten reaction time and force an awkward paddle angle. A compact ready position with the paddle already slightly biased toward the backhand helps shorten the adjustment needed against these serves.
Sources
- How to master the split-step for faster reactions | USA Pickleball
- Comparative analysis of movement patterns and lower–limb biomechanical demands in pickleball and other racket sports | GJSES
- Stop standing like the tin man: Correcting your pickleball stance – The Dink Pickleball